

How to Edit Photos on Your iPhone Using the Photos App

Updated: Jan. 27, 2024

Photo editing doesn't have to be intimidating, and it can even be fun once you know how to edit photos on an iPhone like the pros.
Annie Leibovitz says the best camera in the world is the one you have with you. The famed photographer was referring to the iPhone 4, the first iPhone with a camera good enough for people to leave their point-and-shoot cameras behind. Nine upgrades later, the iPhone 13 takes pro-quality shots. But if you want to take your photos to the next level, learn how to edit photos on your iPhone with easy-to-use editing tools found in the Photos app.
“The ability to edit photos directly on our phones enhances the overall quality of photos taken with phones,” says Matthew Digati, a professional real estate and architectural photographer. “Phone cameras continue to expand their capabilities and can easily capture stunning photos, even for those who are new to photography.”
Indeed, the newest iPhones are so high tech that there are concerns about Apple scanning photos. With these advances come useful iPhone hacks, plus ways to hide private photos on an iPhone and delete iPhone photos from your device by saving them on the cloud. But as far as photographers are concerned, the best part of the updates is the camera itself.
“Photographers are shifting toward working with smartphone cameras, as these keep growing in specs and performance, sometimes outperforming regular cameras,” says photographer Mario Perez, a photography teacher who helps amateur and professional photographers improve their skills. “Today’s smartphone cameras have professional-grade image quality, a decently fast autofocus, and multiple cameras covering a wide array of focal lengths—pretty much on par with what DSLRs or mirrorless cameras used to offer.”
How to edit photos on an iPhone
Once you’ve taken a photo with the iPhone camera, you can edit it using the built-in Photos app, which comes standard with all iPhones and is easily identifiable. It’s called “Photos” and has a rainbow-colored icon. Its location will differ based on how you organize apps on your iPhone, but you can do a search for it by swiping down from your home screen and typing “Photos” in the search box.
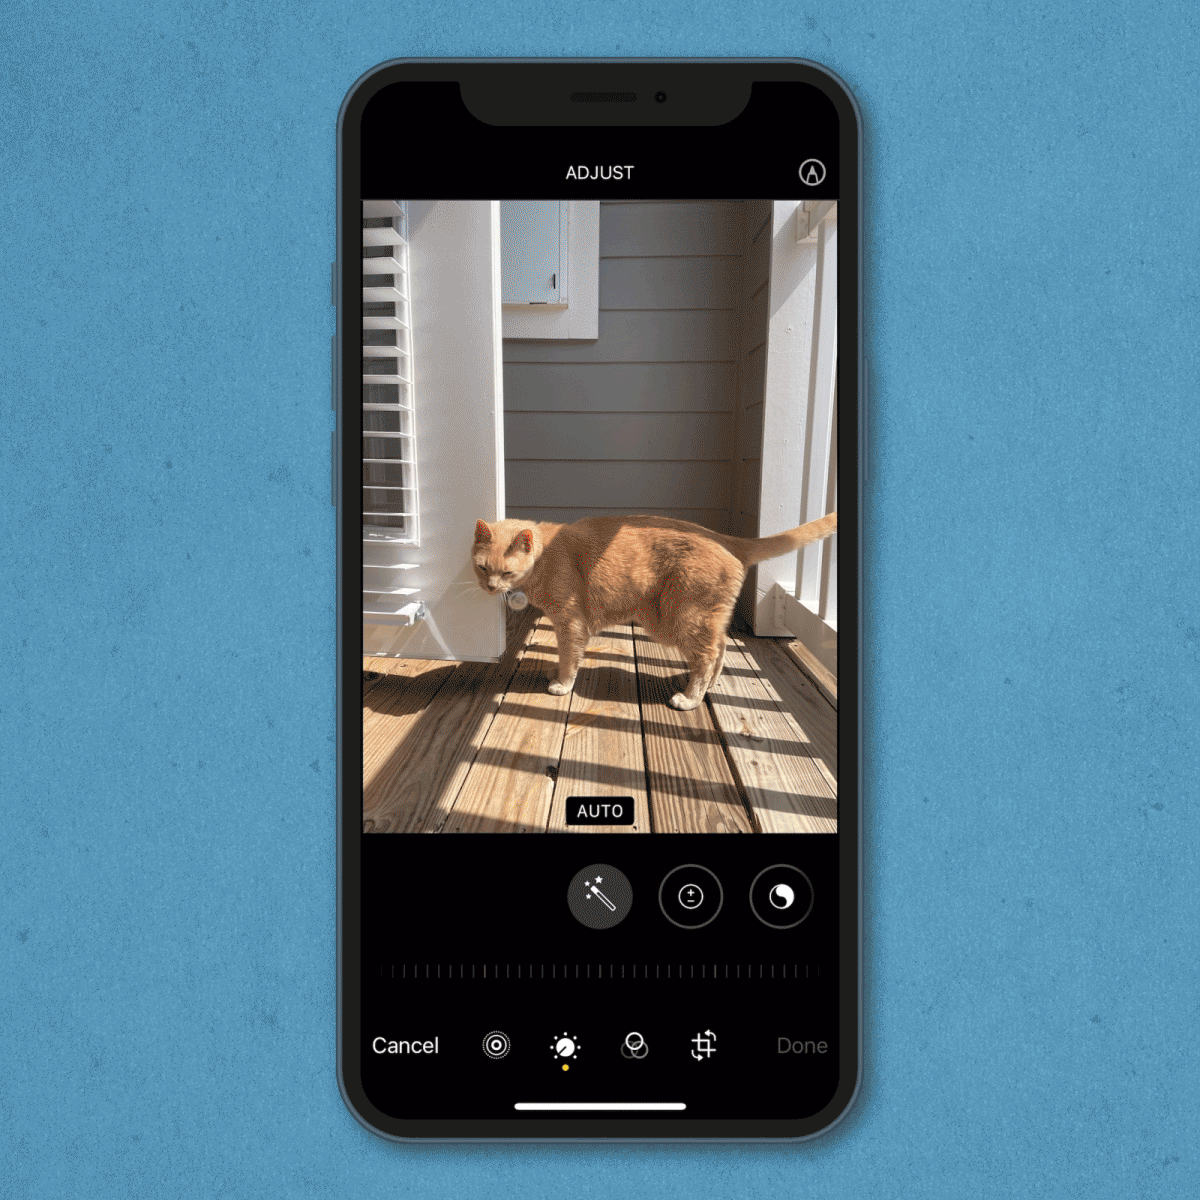
Select the photo you’d like to edit, then click “Edit” in the upper right corner to access editing options and start editing photos on your iPhone.
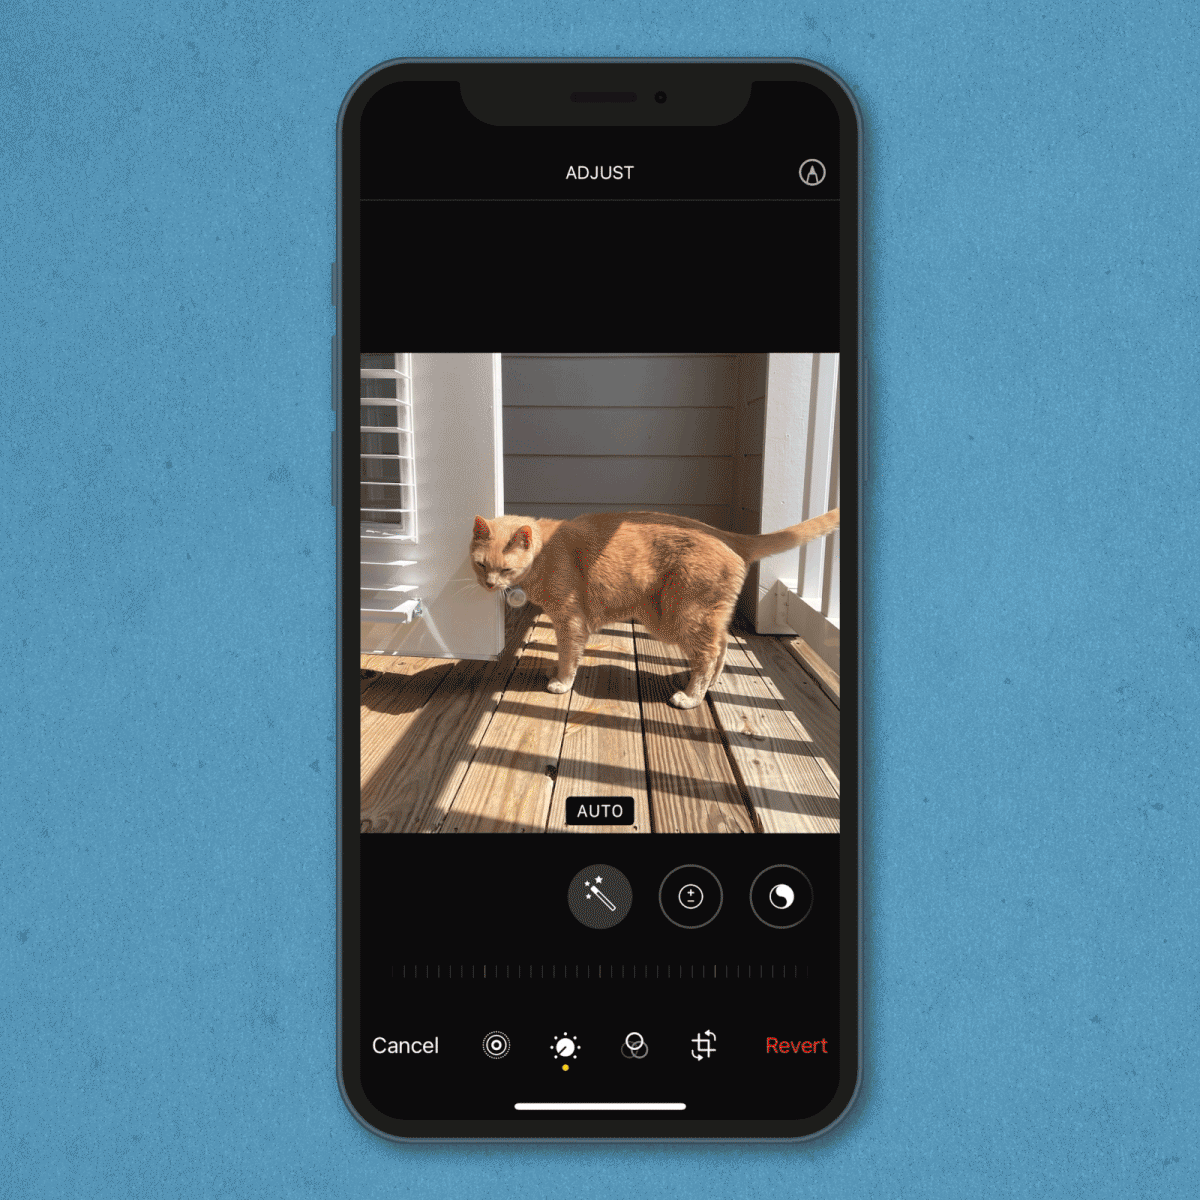
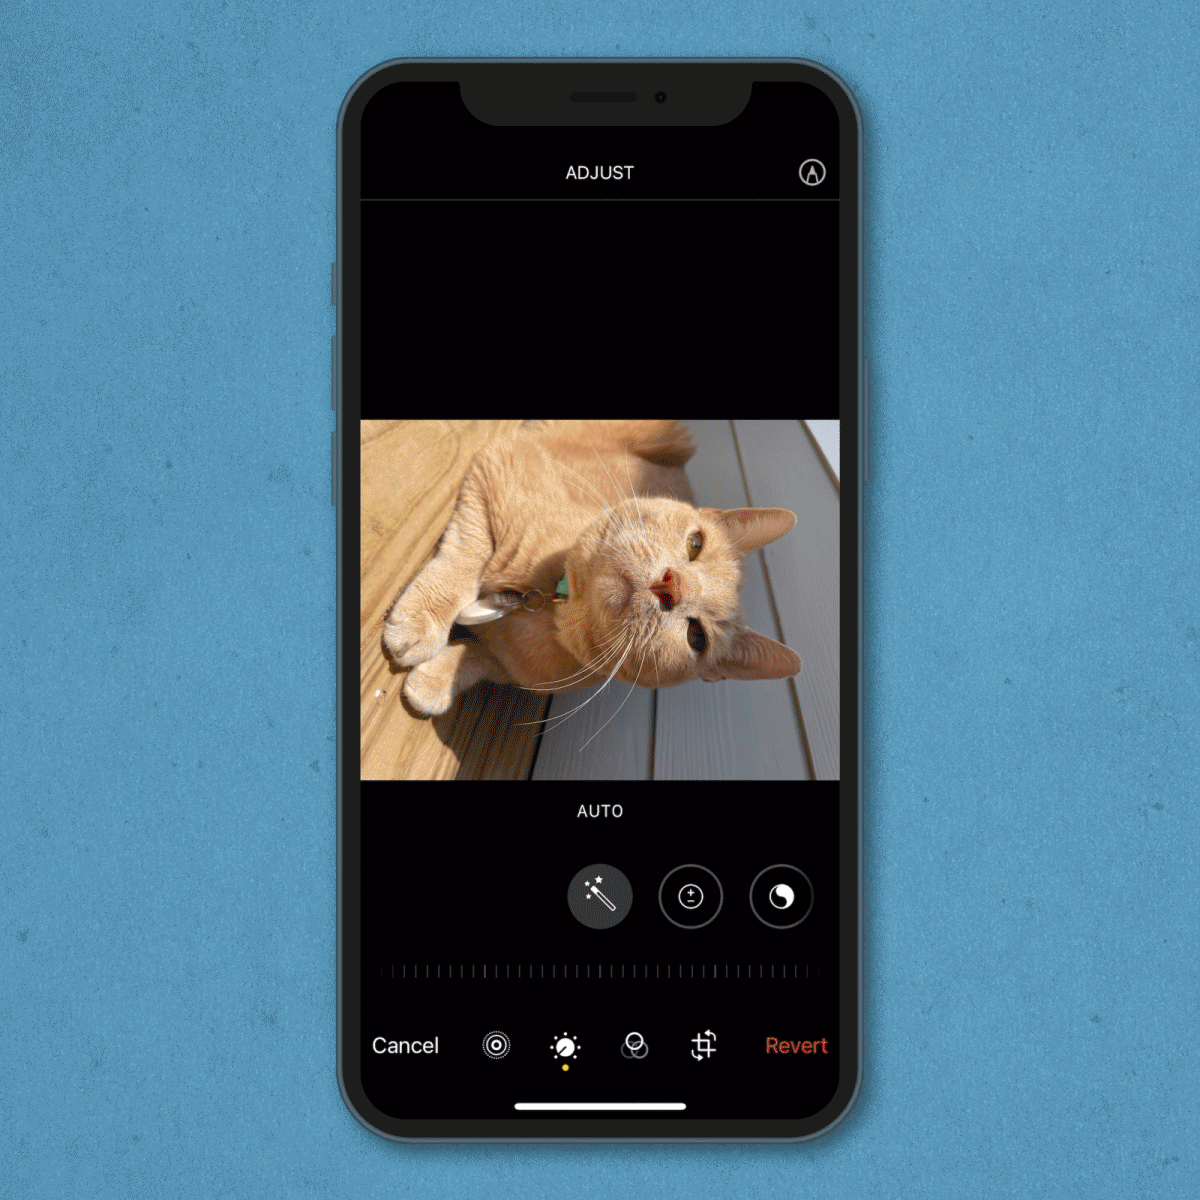
There are a lot of tools and options, but don’t stress. Photo editing should be fun, and unlike with darkroom editing, you don’t have to worry about making changes you can’t undo. “If you don’t like any of the changes, tap ‘Cancel’ and then tap ‘Discard Changes,'” says professional photographer Shirley Lo. And you can always revert to the original photo once editing is complete, she notes. Tap “Edit,” then tap the red “Revert” in the lower right corner. When prompted, select “Revert to Original.”
Another tip: Duplicate the photo before you start editing it, so if the edit turns out less than ideal, you can just delete the duplicate. There’s always the option of recovering a deleted iPhone photo if you change your mind.
How to crop a photo
Usually the first thing people want to do with a photo is crop it to remove background clutter or zoom in on a person or object. “Sometimes, in the excitement of taking a photo, things don’t line up as much as you had hoped,” says professional photographer Ryan Thompson. “As photographers, we use the crop tool to frame our image or subject to make the photo even more appealing.”
Veronica Bareman is a professional photographer who writes about photography for her blog Hip Grandma with a Camera. Her tip for cropping photos like a pro? “Give just a little space around your subject but not so much that the viewer has to squint to find it,” she says. “And be sure to straighten your image so the horizon is level.”
To put those tips into practice, open the photo you’d like to edit. (You can also edit a screenshot taken with your iPhone.) Look for the crop adjust tool. It’s the third icon at the bottom of the screen—fourth if you’re editing a Live Photo or one taken in Portrait mode. It looks like a square with two arrows going counterclockwise.
- Tap the icon.
- You’ll notice a white box around your photo. Drag any of the corners to resize and crop the image.
How to change the aspect ratio of a photo
The term “aspect ratio” sounds fancy, but it’s simply the relationship between the width and the height of an image. And it’s super easy to change with the iPhone Photo app. Just follow the process below.
- Click the crop adjust tool at the bottom of the screen.
- Tap the icon in the top-right corner that looks like a shaded square broken into segments.
- Select the photo size. There’s an option to automatically turn a photo into a square, or you can choose from preset ratios, such as 9:16, 4:5, and 5:7. You can also choose “freeform” for custom dimensions.
- Drag the corners of the box to crop the photo.
How to rotate a photo
If you’ve taken a photo upside down (it happens!) or shot in landscape mode but decided the image would look better vertically (or vice versa), you can achieve this in the same place you went to crop the photo. To change the orientation of an image, follow these steps:
- Click the crop adjust tool at the bottom of the screen.
- Tap the icon in the top-left corner that looks like a square with one arrow pointing counterclockwise.
- Keep tapping it until you achieve the orientation you’re looking for.
How to make a mirror image of a photo
To the left of the rotate icon is an icon that looks like a triangle with a double arrow above it. Tap the icon to create a mirror image of your photo. You might want to make a mirror image if there’s text in the picture you want people to read—it’ll reverse the text.
Sometimes this function improves the composition. And sometimes it just makes you look better, at least according to you. See, when looking at photos of ourselves, we often don’t think they look like us, but by choosing the mirror image, we get the version of ourselves that we see in the mirror. Usually, we find this more attractive.
How to select frames from Live Photos
If there’s one Photos feature that’ll ensure you never want to delete this iPhone app, it’s the ability to select the perfect frame of a Live Photo before editing.
The Live Photos function helps capture the perfect moment by taking a three-second video clip from which you can choose a stand-alone still photo. Live Photos is great for action photography—like wildlife and sports—but it’s also handy for portraits because sometimes the slightest tweak in a facial expression can make the photo. For example, you can turn a frown into a smile, un-blink someone’s eyes, or capture the moment your subject’s foot kicks the soccer ball.
To be able to edit a Live Photo, you have to start by turning on Live Photos, which you can do by opening your camera and looking in the upper right corner. You’ll see three concentric circles. Live Photo is off if you see a diagonal line through the icon. To turn it on, tap the icon. The line will disappear, and the word “live” will briefly appear in yellow at the top of the screen.
Ready to edit your Live Photo? It’s as easy as this:
- Click Edit.
- Tap the Live Photos icon (three concentric circles) at the bottom of the screen. You’ll see the clip broken into frames.
- Slide your finger along the frames until you find the one you like best.
- Lift your finger.
- Tap the “Make Key Photo” button if you want to make this image the one you’ll see in your camera roll.
- Tap the yellow “Live” button at the top if you want to turn your frame into a single photo, disabling Live Photos mode for your image.
One thing to note: While you can turn a Live Photo into a still photo, you can’t turn a still photo into a Live Photo. If you like the freedom to choose the best frame, keep Live Photos turned on.
How to change a photo’s filter
The iPhone comes with 10 filters ranging from vivid, an amped-up version of your original, to noir, a classic black and white. Whether you decide to stick with the original or use one of Apple’s filters, you can “add your own twist,” as Lo says, “and edit your photos to suit your style.”
To give a preset filter a try, follow the steps below.
- In Edit mode, click the icon that looks like three interlocking circles.
- Drag your finger along the slider, or tap each thumbnail photo, to see each filter reflected on the larger image above.
How to customize your iPhone photos
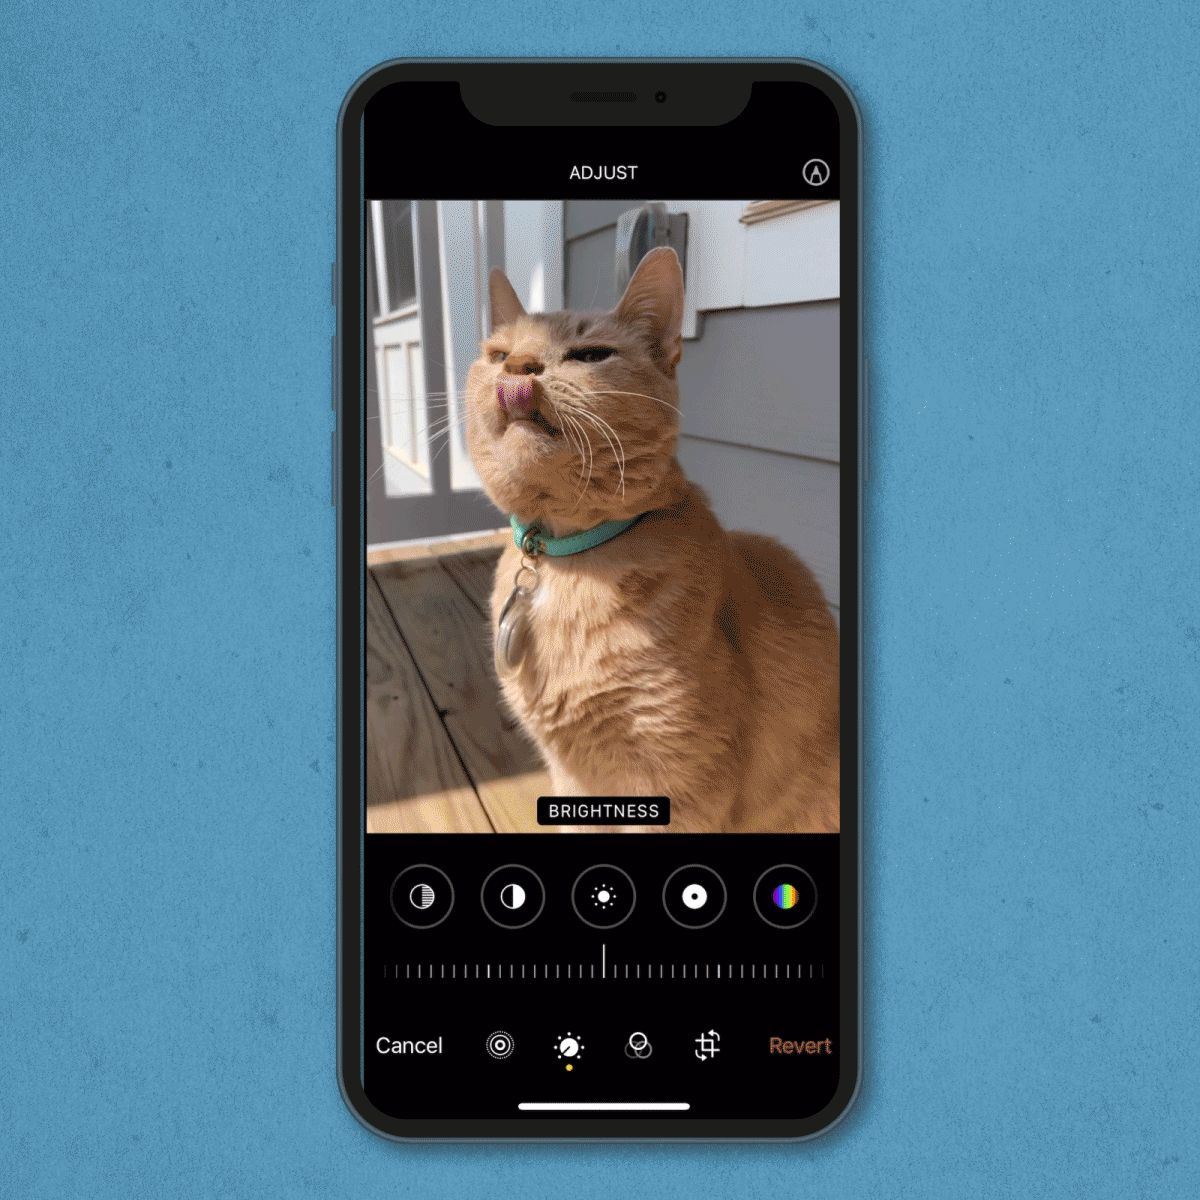
Once you’ve created a still from a Live Photo and gotten it in the shape and size you want, there are additional ways to fine-tune your image. The icon you want to look for is, appropriately, a tuner—a circle with a needle pointed to one of the seven dots surrounding it. You’ll find it at the bottom of the screen, a couple icons to the left of the crop tool.
Here, you can increase or decrease the exposure, brilliance, contrast, and more. Just slide your finger along the lines at the bottom; go one direction to increase the value and the opposite direction to decrease it. Doing this will revolutionize your photos. You may be so wowed by the finished product that you end up editing random photos for fun. (If that’s the case, you may as well add a widget to your iPhone to help you appreciate those stunning images.)
And remember: If you don’t like your edits, you can always delete the changes and start over. When you’re happy with your edited photo, simply tap the yellow “Done” in the bottom right corner. It’ll save to your Photos app, where you can email, text, or AirDrop it to share.
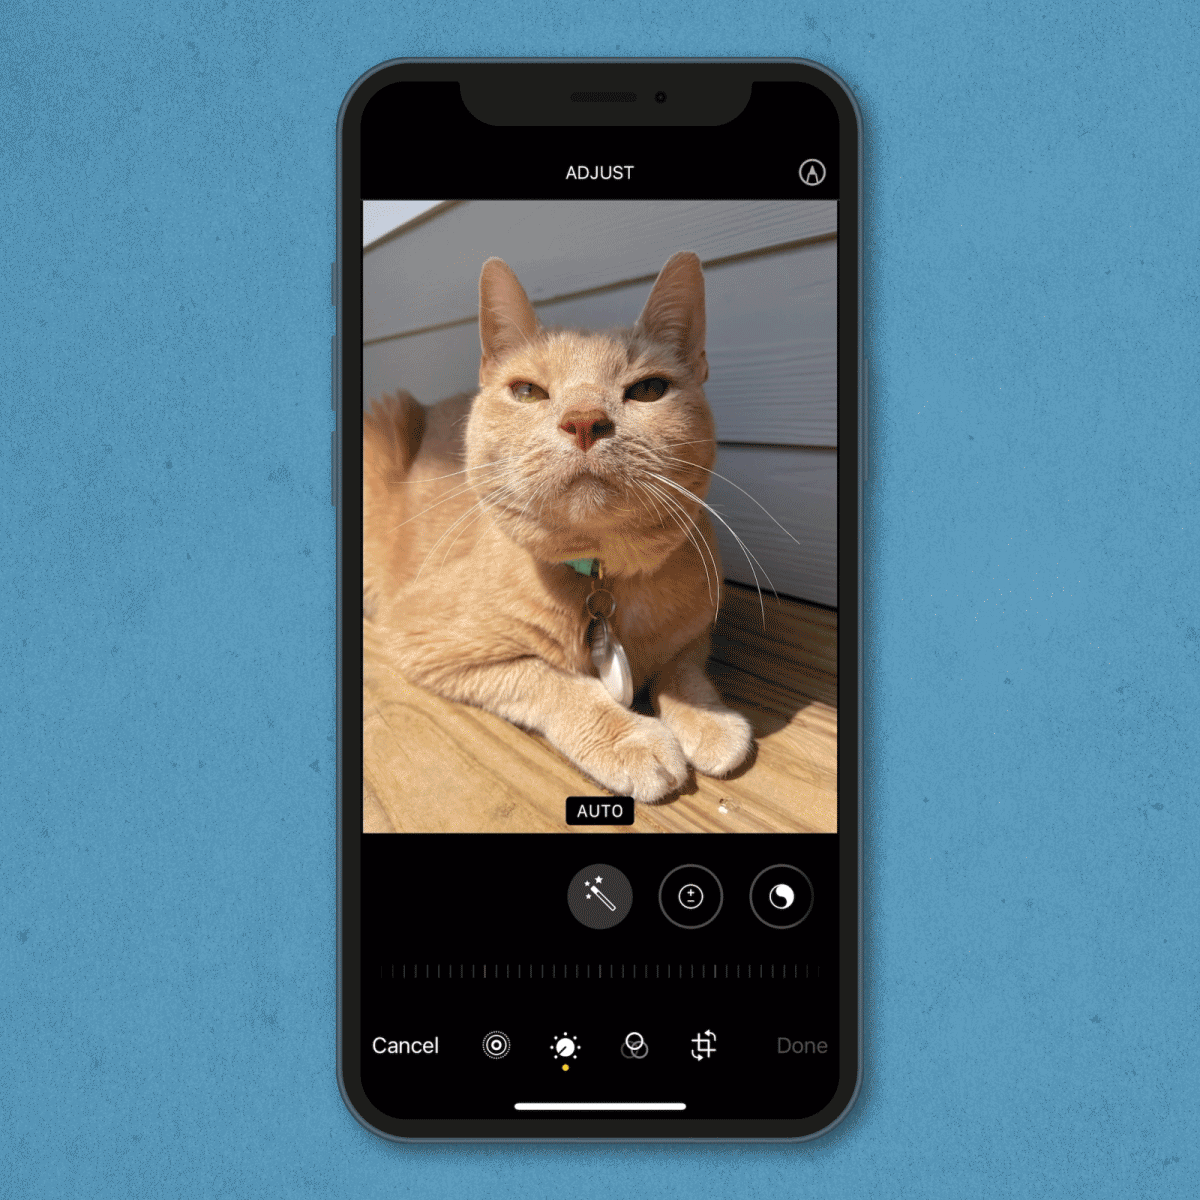
Auto-enhance the photo

When you tap the tuner tool, you’ll see a row of icons below the photo. The first one, labeled “Auto,” looks like a magic wand and can be helpful for applying standard adjustments.
That said, the pros generally avoid this function because it takes away editing control. “Use a light touch when editing and try to stay away from the Magic Wand button,” says photographer Kate Byers. “You want to be in control of each of the tiny adjustments you can make instead of letting the phone do it for you.”
Change the exposure
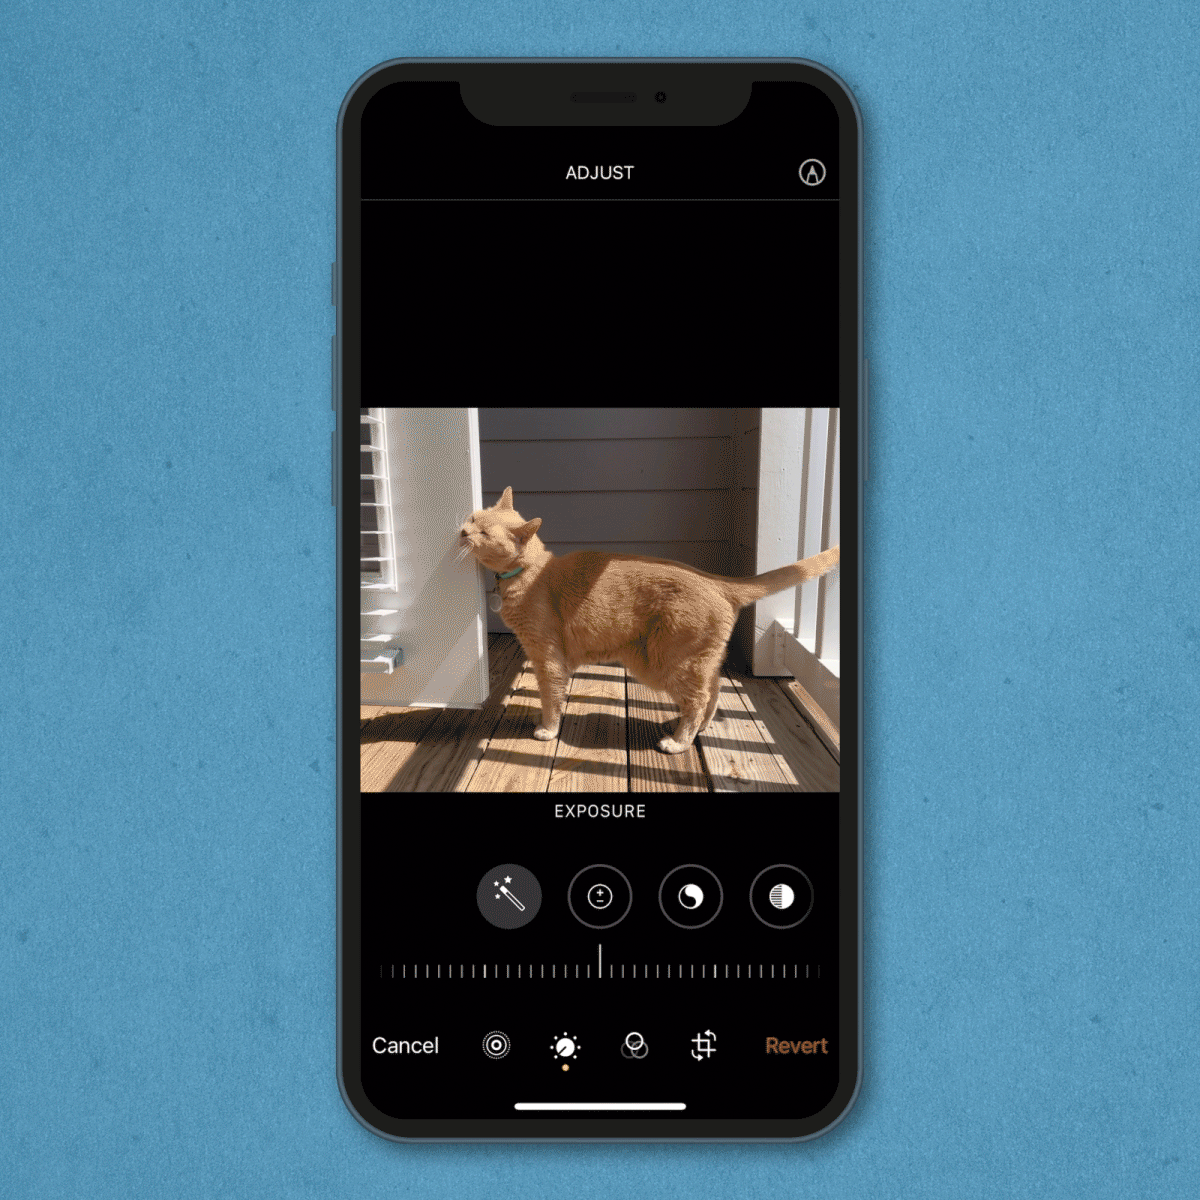
“Leveling up your phone photo game starts when you capture your image,” Byers says. “Make sure that when you take your photo, your back is to your light source [like a window] and that there is ample light on your subject.”
If you don’t have the best light to start with or can’t position yourself properly—maybe you want specific scenery in the background, for example—don’t fret. Once you know how to edit photos on an iPhone, you can fool everyone into thinking your camera captured the perfect amount of light.
Your first order of business when faced with a too-dark photo? Increasing the exposure. (Look for the icon of a circle containing a plus and minus sign.) The feature can bring the image to life, but overdoing it can wash out details, so go slowly. There are other tools for increasing brightness, and your image may look best when you use a combination of them.
Adjust the brilliance
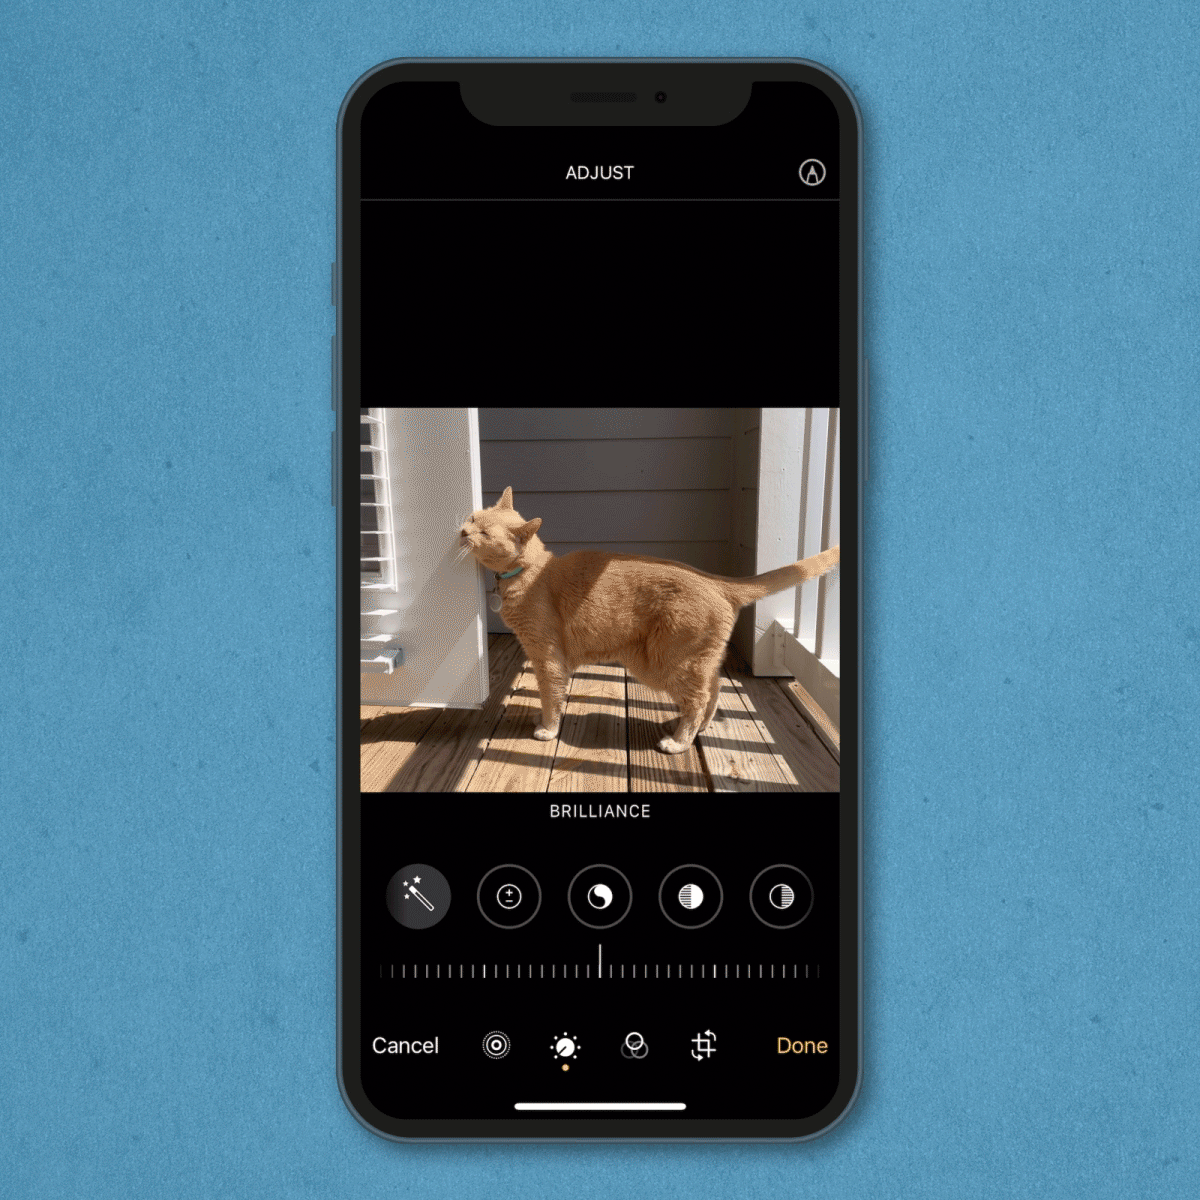
Just as the Voice Memo app has more than a dozen features users often overlook, the Photos app includes tools you’ve probably been neglecting. Take, for instance, the brilliance feature, which enhances details and makes photos look more vivid.
“Adjusting the exposure adjusts all of the light values inside of an image and will make them all act a bit brighter,” explains Jaye Cole, a professional photographer and photography teacher. “However, adjusting brilliance will only affect the mid-tones of the image, which will keep you from overexposing the highlights in your image.”
The icon for adjusting brilliance is a circle divided between white and black with a wavy line. It looks like a yin-yang without the dots.
Adjust highlights
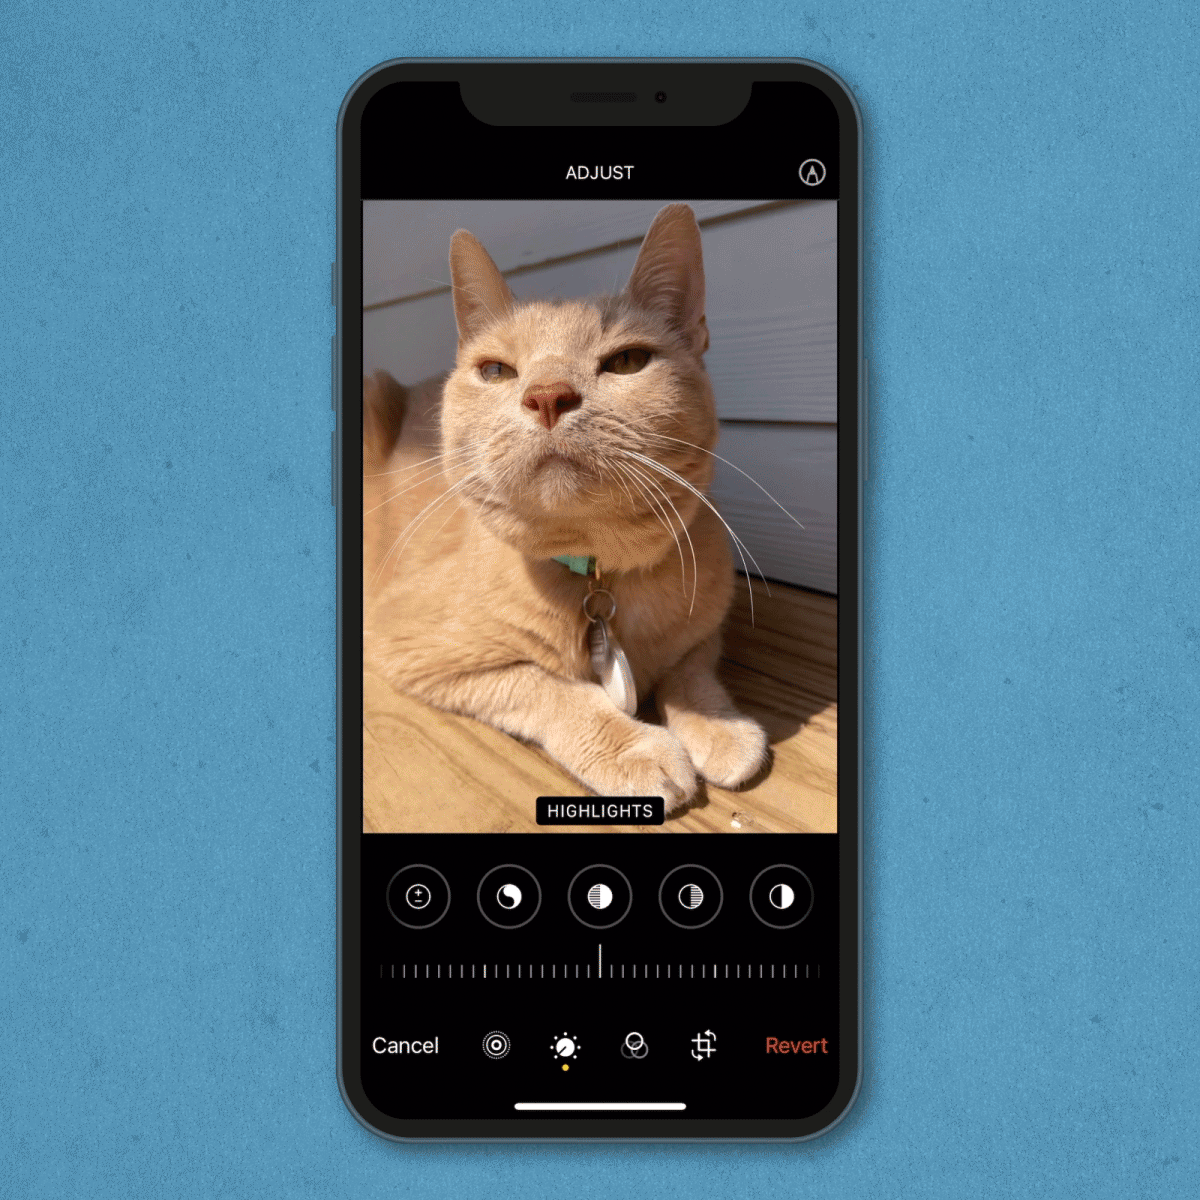
To the right of the brilliance icon is a circle divided; the right half is solid white, and the left half is black-and-white lines. Adjusting highlights is a variation on adjusting exposure, but it only increases the brightness in the lightest areas of the original photo.
Adjust shadows
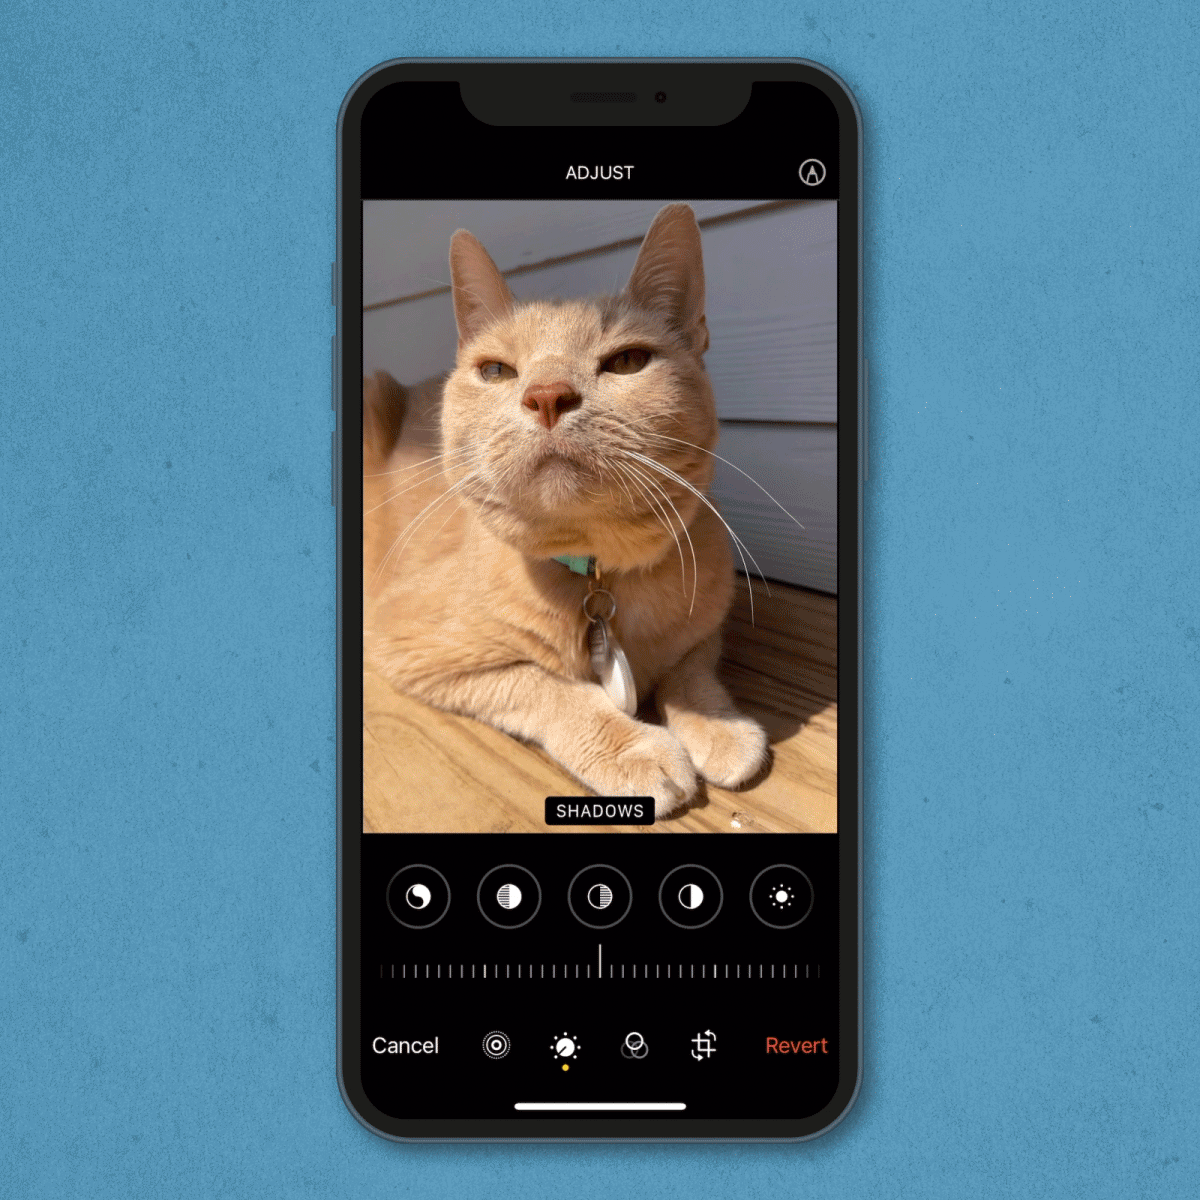
Shadows add more depth and dimension to your photo and are one way to make people look silhouetted against a lighter backdrop. Adjusting the shadows is more or less the opposite of adjusting the highlights. It allows you to manually lighten or darken the areas of the photo that are more shadowed, which may lack visual detail.
The shadow icon is a circle split in two, with the right half featuring black-and-white lines and the left half solid black.
Create contrast
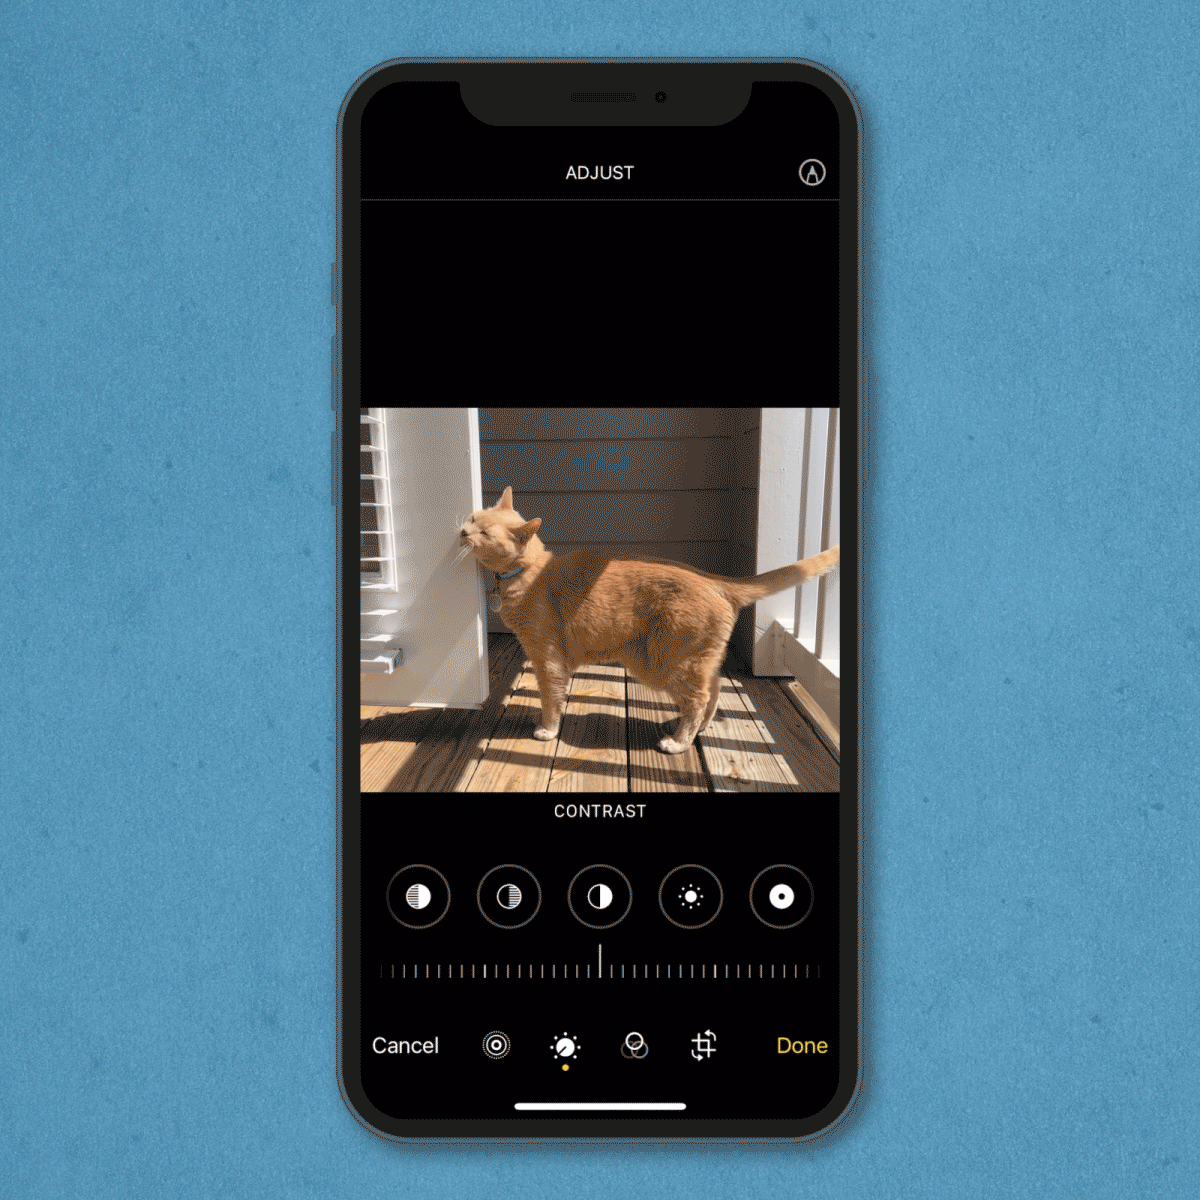
Sometimes a photo comes out too light or too dark and needs additional depth. “Adjusting the contrast on a photo can make it more interesting and easier to see details,” says Thompson. “The contrast tool allows us to make the dark colors darker and the light colors lighter, but be cautious not to add too much contrast, as it can ruin a photo.”
Here’s how to edit photos on your iPhone using the contrast tool: Tap the icon that’s a circle split in two, with the right side solid white and the left side solid black. Swipe left to increase the level of contrast.
Brighten the photo
Adjusting the brightness of a photo isn’t the same thing as increasing exposure, brilliance, or highlights. Unlike those methods, it affects all pixels equally. By increasing a photo’s brightness, you can lighten both the dark and light areas. Ready to get started? Tap the icon of the white circle with white dots around it—it looks sort of like a sun.
Enhance the colors
Ho-hum colors don’t stand a chance against the saturation and vibrancy tools, which you’ll find alongside other editing features. Whether you’ll use one over the other—or both—depends on the image and the color you’re trying to achieve. To give your photos a color boost, try the iPhone tricks below.
Adjust saturation
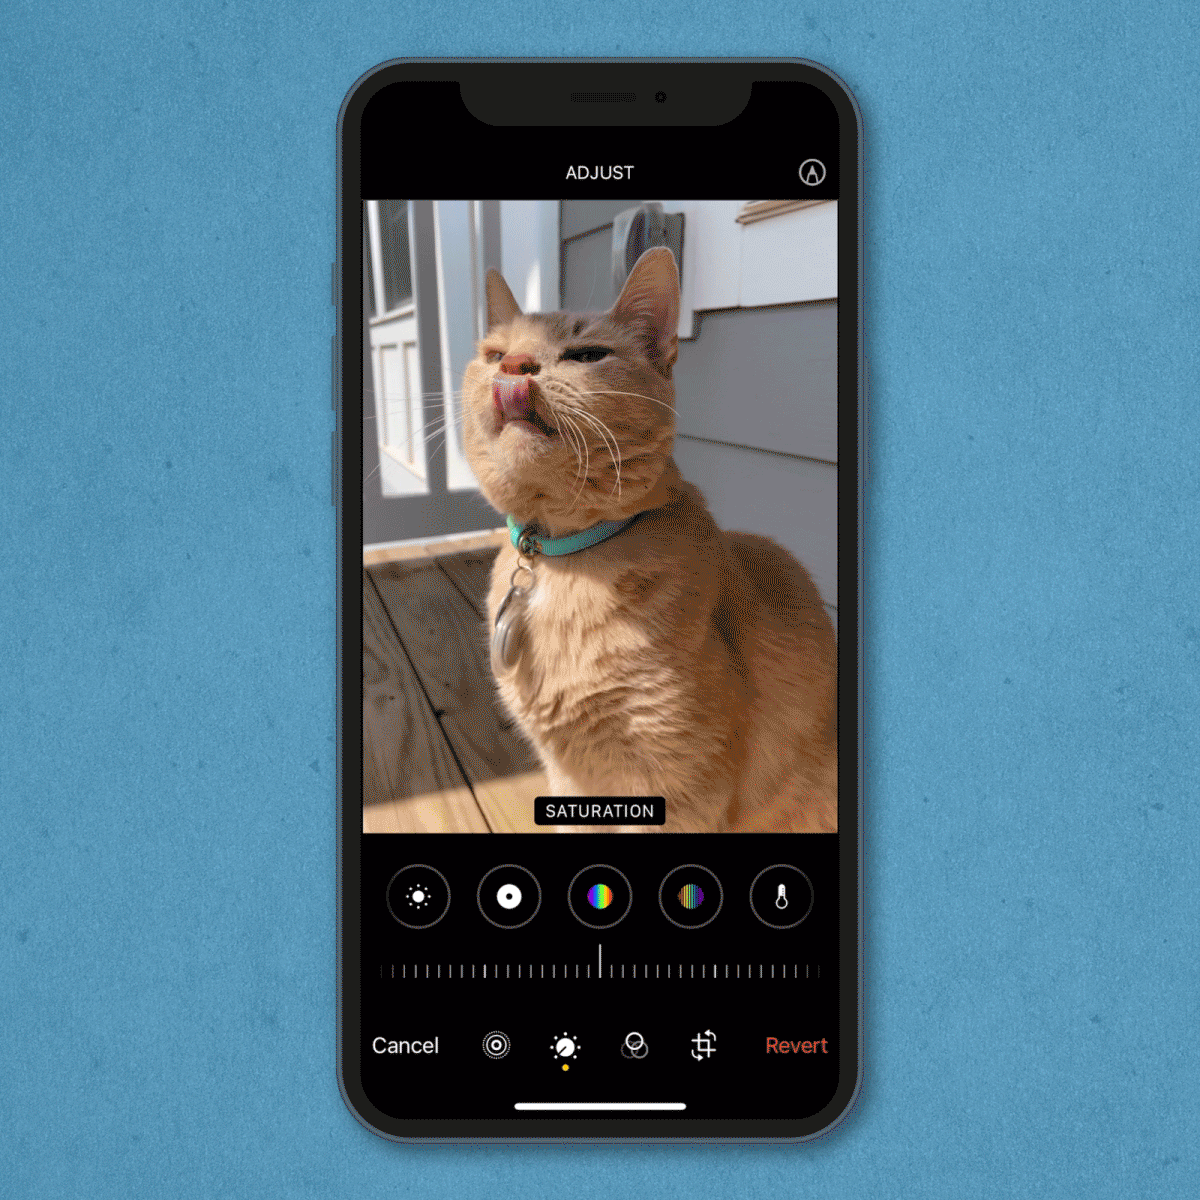
“If the colors on your photo seem a bit dull and you want to make them more vibrant, you can do that with saturation,” Thompson says. “Saturation is the key to making a black-and-white image or an image that pops with color. While oversaturating an image can look artificial, it’s a great tool for making nature photos stand out.”
Scroll through the editing icons until you come to the circle with a rainbow inside it. Turn the dial bar to the left to make the image more colorful or to the right to make it grayer.
Make incremental adjustments to match the photo to what your eye saw. If you’ve already brightened the photo, you might not need a huge saturation boost, if you need to adjust it at all.
Adjust vibrancy
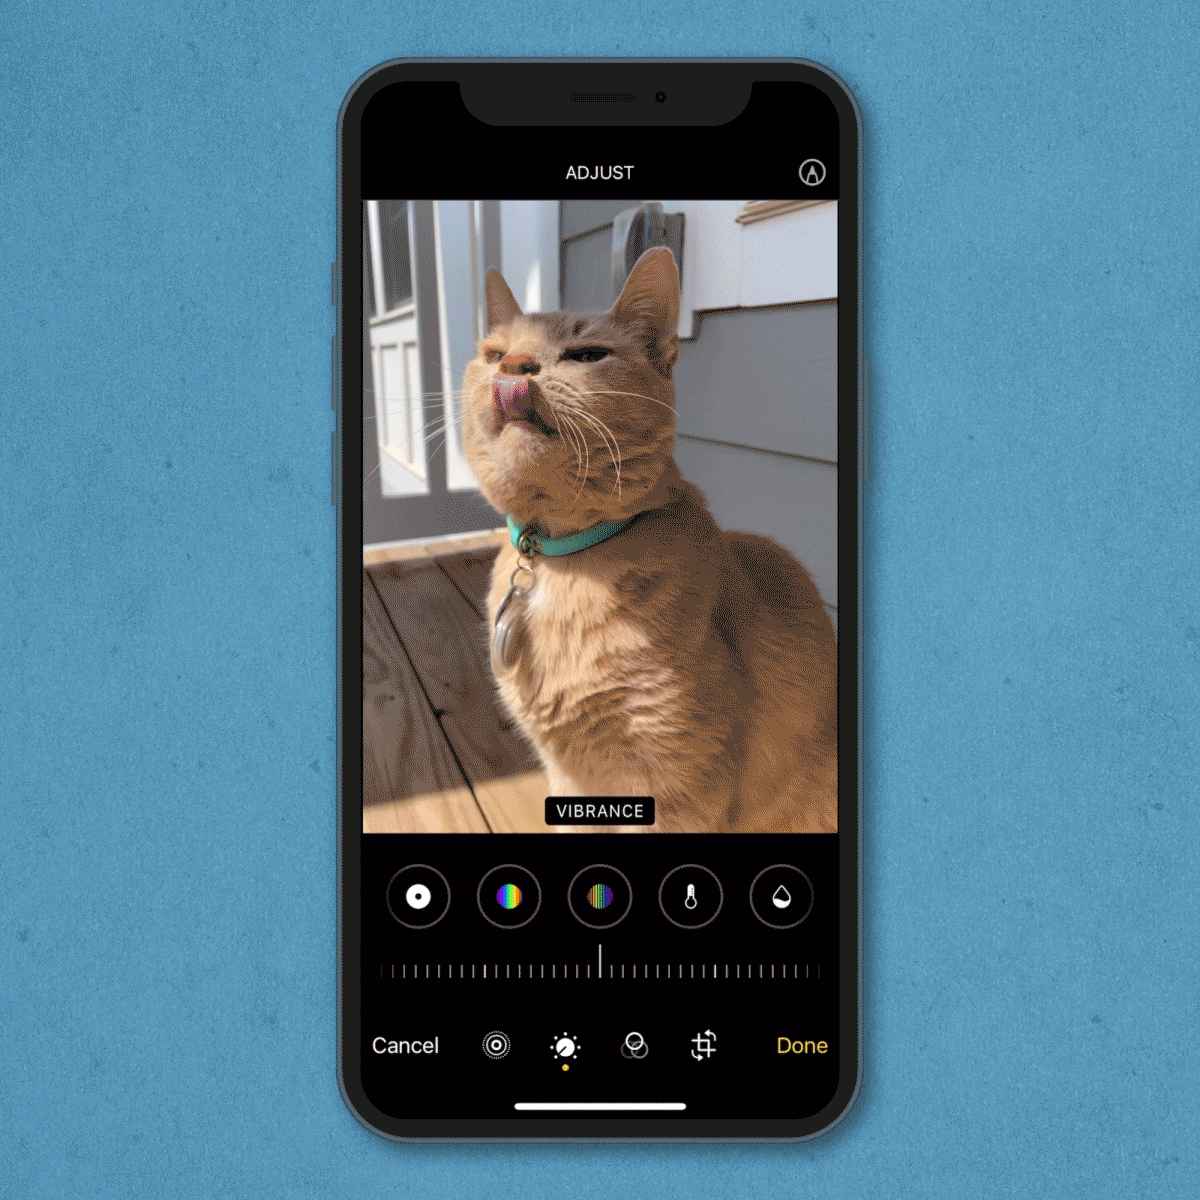
To the right of the saturation icon is the vibrance icon, which is also a circle with a rainbow inside, though the rainbow has stripes over it. “Saturation will cause more dramatic changes, and vibrance will be more subtle,” Digati says.
It’s a great option when adjusting colors of photos that feature people. “Vibrancy makes colors pop without accidentally making your human subjects look orange,” says Cole. “But be careful when adjusting saturation or vibrancy, as a little goes a long way. Adding even just a little too much will make your image look cheap and photoshopped.”
How to use a photo-editing app
In addition to the Photos app that comes with all iPhones, there are other apps that professional photographers recommend for editing your snapshots. Bonus: Many are free.
“To get a professional look on your photos without a lot of gimmicks,” Cole recommends the Adobe Lightroom app. “It uses all the same tools that professionals use and has really powerful options, such as subject and sky isolation.”
Perez also likes Lightroom but adds that Photoshop Express and Snapseed are his recommendations “if you’re looking for a good balance between easiness and richness of features.”
Amanda Sudimack is a global photographer who also teaches photography online. Like the other pros, she uses Lightroom “for almost everything on phones and laptops.” She also recommends trying VSCO—because it has advanced filters, effects, and presets to help improve your photos—and Facetune, which she says is “actually really good at auto-retouching.” Faces can easily be overedited, which makes them look fake, so less is definitely more with the Facetune app.
Once you’ve mastered how to edit photos on an iPhone, learn more useful smartphone tricks, like how to lock apps, image search and the best iPhone keyboard shortcuts.
Sources:
- Matthew Digati, professional real estate and architectural photographer
- Mario Perez, photographer, photography teacher, and founder of Blog del Fotografo
- Ryan Thompson, professional photographer
- Kate Byers, photographer and founder of Lo and Behold
- Jaye Cole, professional photographer and photography teacher
- Veronica Bareman, professional photographer and founder of Hip Grandma with a Camera
- Shirley Lo, professional photographer
- Amanda Sudimack, professional photographer and photography teacher


Originally Published: May 05, 2022