

How to Create the Perfect Half-Up Top Knot Bun

Updated: Dec. 16, 2022
The half-up top knot bun is the epitome of sophistication, but if you don't know how to do it right, it can look messy in a hurry. Here's how to master the classic look.

The timelessness of the top knot
There’s a reason this is the favorite style of Instagram style stars: It’s easy to do, doesn’t distract from the rest of your look, and is flattering for all face shapes. Read on for step-by-step instructions.

Step 1: Start with dry hair
You’ll want to start with dry strands or second-day hair, suggests Jean Oh of the Nunzio Saviano Salon in White Plains, New York. Need a blow-dry tutorial? Try these tricks for a long-lasting blowout.
Step 2: Dry shampoo (optional)
Greasy roots? Fine or thin strands? Hair just needs a pick-me-up? Give your roots a spritz of dry shampoo to refresh, add volume, and revive limp locks. Dry shampoo also adds grit to strands, which will help hold your top knot in place.
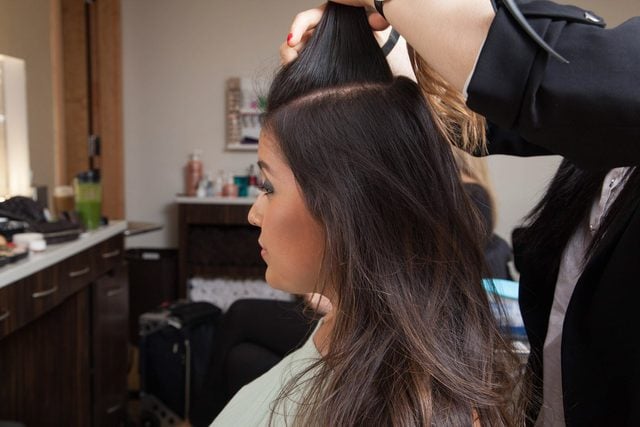
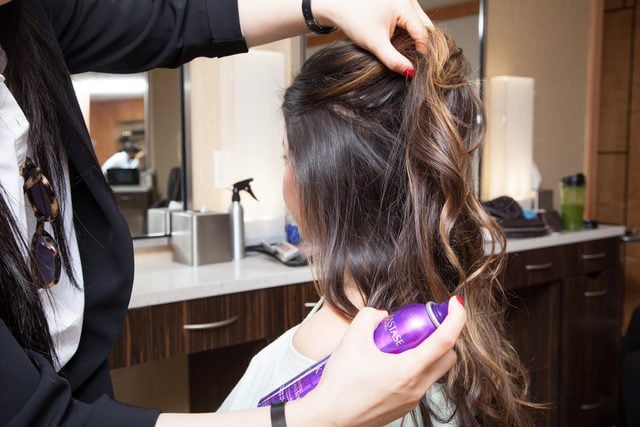
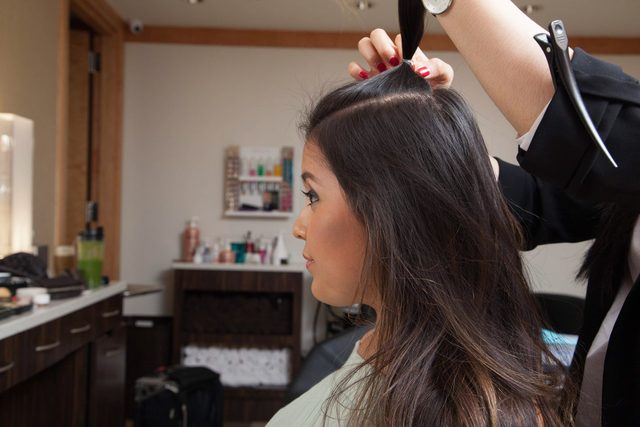
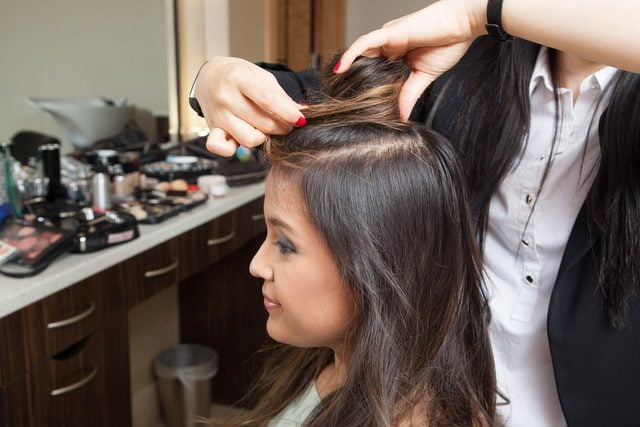
Step 3: Section strands
Use your fingers (a brush or comb works too) to section out approximately 1/3 of the front of your hair—starting from the front and extending to the crown of the head. Here’s how to find the best hairbrush for your hair type.
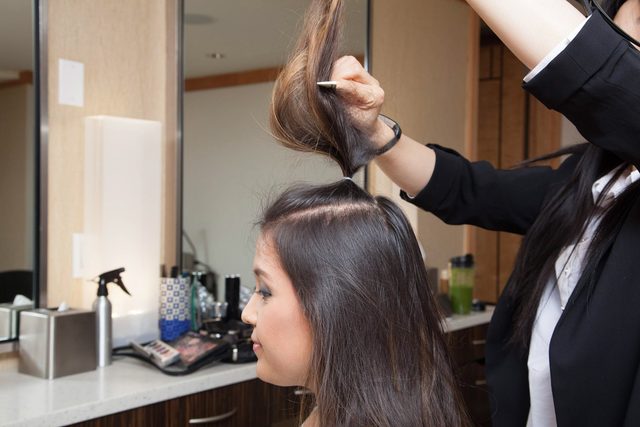
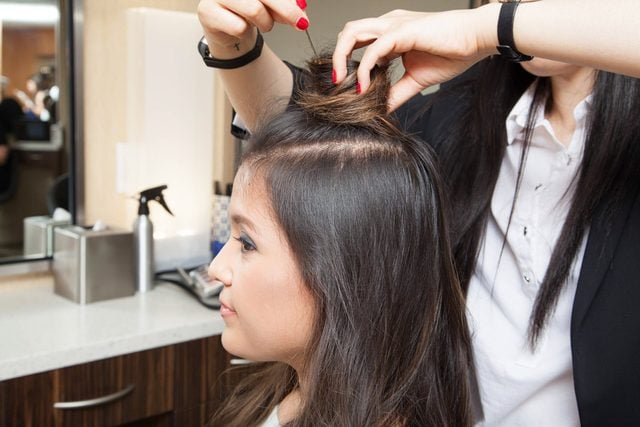
Step 4: Secure ponytail
Once your mini ponytail is in the ideal placement at the top of your head for your top knot bun, secure it with a snag-free hair tie.
Step 5: Backcomb ponytail
Backcomb the ponytail to amp up the volume. Then hit it with texture spray, like Living Proof Instant Texture Mist, for instant, effortless texture.
Step 6: Wrap it up
After your ponytail is in place, wrap all the hair from the pony in a clockwise direction around the elastic to sculpt the knot.
Step 7: Secure
Use bobby pins to lock your bun into place. Pro tip: Be sure to place pins at the top and the bottom of the bun, making a point to get strands from the bun and securing them to the head.
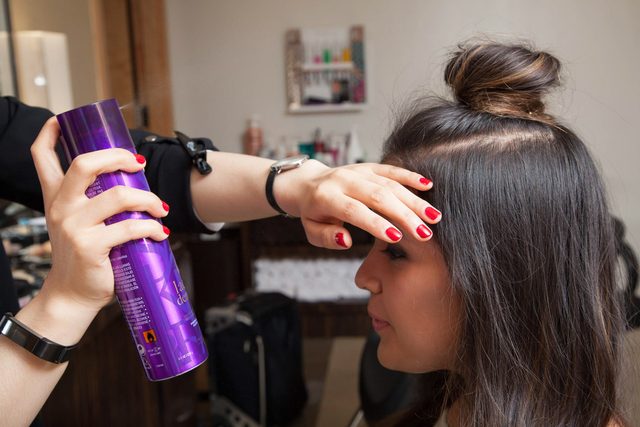
Step 8: Set with hairspray
Finish with lightweight, humidity-resistant hairspray to ensure your style stays put—not to mention smooth, shiny, and frizz-free—all day.
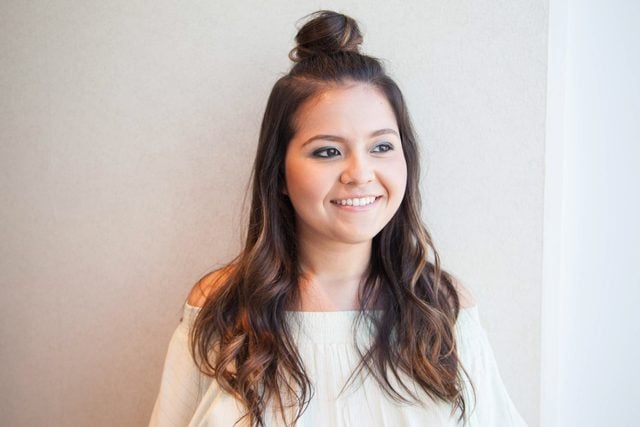
Step 9: Rock your cute ‘do!
What’s great about this ‘do is that it’s super versatile and can go from day to night or from casual to formal. Craving a more laid-back look?
Originally Published: July 23, 2017