Adorable Acorns
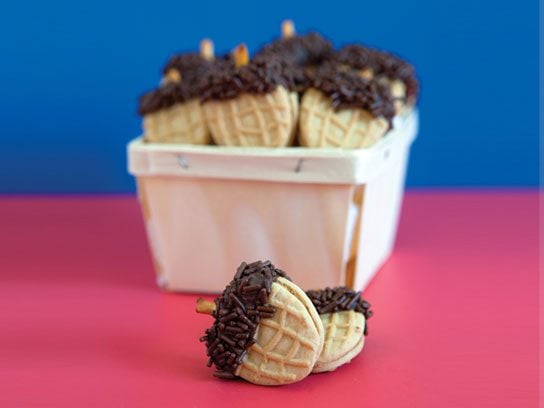
Makes 24 cookies
12 Nutter Butter cookies
12 small pretzel sticks
6 ounces chocolate candy coating
2/3 cup chocolate sprinkles
1. Cut the Nutter Butter cookies in half through the center point. Break the pretzel sticks in half.
2. Melt the candy coating according to package directions.
3. Dip the cut end of a cookie into the candy coating, covering only about one-quarter of the cookie. Immediately sprinkle the chocolate sprinkles over the candy coating.
4. Dip the end of a pretzel stick into the candy coating and then attach it to the candy coating on the cookie; this becomes the acorn’s stem.
5. Place the cookie on waxed or parchment paper. Repeat with the remaining cookies. Allow them to dry until the candy coating is firm to the touch.

Along Came a Spider
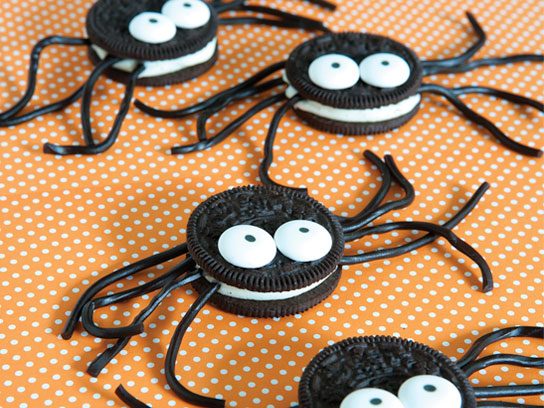
Makes 12 cookies
Black licorice laces (about 16 feet long)
12 chocolate sandwich cookies
1 cup white candy coating
24 candy eyeballs
1. Cut the licorice into 48 strips, each approximately 4 inches in length.
2. Gently twist open the chocolate sandwich cookies.
3. Place four licorice strips onto the side of the sandwich cookie with the filling, and press gently into the filling.
4. Prepare the candy coating according to package directions. Working one cookie at a time, spoon approximately 1 to 2 teaspoons of the candy coating on top of the licorice strips and cookie filling. Place the top back on the sandwich cookie.
5. With a spoon, place a small amount of candy coating on top of the sandwich cookies where the spider eyes will be placed. Immediately place two candy eyeballs onto the candy coating. Repeat with the remaining cookies. Allow to dry for at least 2 hours.

Lovely Little Layer Cakes
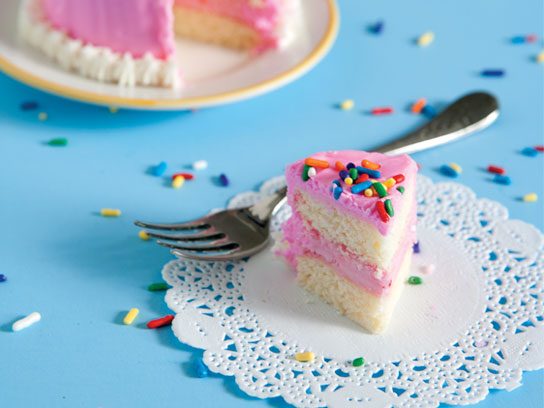
Makes 6 cookie cakes
12 soft bakery cookies of your choice (I used Lofthouse cookies, which come already frosted!)
1 (16-ounce) can frosting in color of your choice
1/2 cup sprinkles in color of your choice
1 (8.4-ounce) can Cloud White Betty Crocker Decorating Cupcake Icing
1. Cut each cookie with a round cookie cutter (should be slightly smaller than the size of the cookies), creating 12 cookies that are all equal in size and shape. Set the leftover scraps aside.
2. Place six of the cookies onto the plate or plates they will be served on. Spread frosting on the top of each of the six cookies.
3. Place an unfrosted cookie on top of each frosted cookie, facedown, with the top of the cookie facing the frosting.
4. Spread the frosting on the top and sides of each cookie cake.
5. Garnish the top of the cookie cakes with sprinkles or cookie crumbs from the leftover scraps that you set aside. Pipe decorative cupcake icing around the base of the cookie cakes.

O Christmas Tree
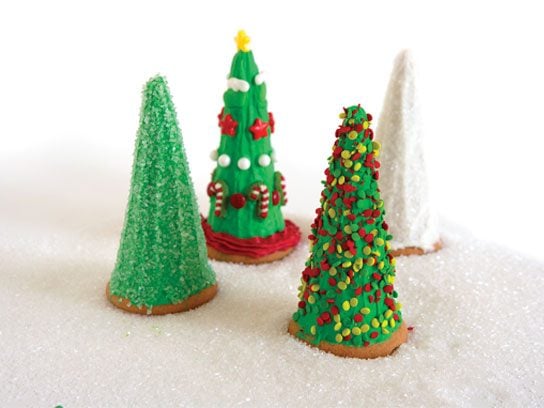
Makes 12 cookies
1 (16-ounce) can white frosting
Green food coloring
12 round cookies, slightly larger than the widest part of the sugar cones
12 sugar cones
1 cup of your favorite sprinkles, candies, or sugars, for decorating
1. To make green frosting, place the white frosting in a bowl and add the green food coloring one drop at a time, stirring after each addition. Continue adding color and stirring until the desired shade is reached.
2. Spread the cookies with a layer of frosting.
3. Place one sugar cone on each cookie. Ice the sugar cones with frosting. Add sprinkles, candies, or decorations as desired.
Smart Cookie Tip: Experiment with different colors for these Christmas trees, and you can easily create black witches’ hats for Halloween or even blue wizards’ hats.

Beautiful Ballerinas
Makes 12 cookies
1 (16-ounce) can Duncan Hines Creamy Home-Style Strawberries ’N Cream Frosting
12 Nutter Butter cookies
White candy writer
12 pink candy hearts (about 1/2 inch in size)
1. Place the frosting in a microwave-safe bowl and heat for 10 seconds. Remove from the microwave and stir well. If the frosting is a consistency similar to syrup, it is ready to coat the cookies. If it’s too thick, return it to the microwave for 5 additional seconds, remove, stir, and repeat until the frosting has a syruplike consistency.
2. Place the cookies on a wire rack on top of a baking sheet lined with waxed or parchment paper to catch excess frosting. Either pour or spoon the melted frosting over each cookie, covering the entire top and sides of the cookie. Allow the cookies to dry for at least 4 hours.
3. Prepare the candy writer according to package directions. Use the candy writer to draw a white insole area onto each cookie. Immediately place a candy heart at the base of the white area on each cookie. Allow to dry for at least 2 hours.

Continue the Decorating Fun
Arrive at any event with adorable (and pre-made—shh!) cookies with even more decorating how-to’s from Smart Cookie, the creative recipe book from cookie whiz Christi Farr Johnstone. Take a look here.
Reprinted with permission from Smart Cookie © 2014 Christi Farr Johnstone, Running Press, a member of the Perseus Books Group.