How to Make a Bed the Right Way, According to Experts
Updated: Mar. 20, 2024

Whether you're making your bed in the morning—or stripping it down, laundering everything and starting from scratch—here's how to do it right
Our editors and experts handpick every product we feature. We may earn a commission from your purchases.
We’ve all had mornings when the last thing we want to do is get out of bed—and the second-to-last thing is think about how to make the bed. Even so, according to a 2010 National Sleep Foundation study, 71% of Americans make their beds every morning or almost every morning.
One of the biggest advantages of making your bed as soon as you wake up is that you can check off one thing from your cleaning schedule before your first cup of coffee. And it may even be easier to remember how often to wash your sheets when you stay on top of things. Plus, if you invest in the best bed sheets, you might even enjoy smoothing out that luxe fabric every morning. Before you know it, you’ll want to learn how to fold a fitted sheet too. And we also give the full instructions for how to make up a bed from scratch after you’ve stripped all the bedding off and laundered it. So if you want to develop some of the habits of productive people, start by making your bed.
Get Reader’s Digest’s Read Up newsletter for more cleaning, humor, travel, tech and fun facts all week long.
What are the benefits of making your bed?
The focal point of a bedroom is the bed. So when the bed looks tidy, with straight covers and neatly positioned pillows, it can make you feel ready to face the day. Other benefits of making your bed include:
- Your bedroom looks neater.
- It sets you up for success.
- It gives you a more organized mind and a calmer outlook.
- It is relaxing and reduces stress.
- It improves focus.
We asked a veteran cleaning pro and an owner of upscale vacation rental homes for tips on how to make a bed, both in the morning and after you’ve stripped and laundered the sheets and are making the whole thing up from square one.
How to make your bed daily
Clear the deck! You cannot work productively with clutter from books, newspapers and midnight snacks.
- Remove all the extraneous stuff from your bed. Yes, even that chocolate bar you have tucked under your pillow.
- Place all pillows on a chair or in a basket.
- Turn back the comforter/duvet, blanket (if there is one) and the top sheet.
- Smooth the wrinkles out of the bottom sheet, pulling the sheet tight and tucking the excess under the bed’s mattress.
- Dust off the sheet with your hand. From any crumbs around the pillow to dirt from your bare feet—get rid of it.
- Pull the top sheet up to the edge of the mattress and smooth out any wrinkles. Make sure the sheet drapes evenly on both sides of the bed.
- Repeat the above step with the blanket, then with the duvet.
- Fluff the bed pillows. I like to give my pillows a couple of punches on the sides and the ends every day. That fluffs them up really nicely. No need to fluff solid foam pillows. They don’t need it—and you might sprain your wrist or lose a nail if you try.
- Place pillows (here are the best ones, FYI) over the covers with the open end of the pillow case on the outside of the bed.
- Arrange the shams and throw pillows to your liking.
- Add a throw blanket to the end of the bed.
- Done!
How to make the entire bed in 9 steps

Who says spring cleaning has to happen only once a year? A nicely made bed—starting from square one—starts with clean linens. That’s why you should wash your sheets and pillow cases (including protective cases) every week or two, depending on how many people sleep in the bed (including pets), if you eat in bed, if you sweat a lot during the night and if you toss and turn all night. Your duvet or duvet cover should be washed every three to six months, or whenever it appears dirty (and the bedskirt should be washed in that same timeline). A pure white duvet will obviously show dirt faster than a printed or dark duvet.
On This Page
Step 1: The bedskirt
When you’re making your bed, start with this item, which is also sometimes called a dust ruffle. Align the corners of the bedskirt with the corners of the mattress. Make sure the bedskirt is even all the way around the bed.
“Bedskirts are not hard to put on, but they are hard to make look right after adjusting the mattress on top,” says Green Cleaning Coach Leslie Reichert. “Remove the top mattress. Put the bed skirt on the box spring. Pin the skirt to the box spring with large thumb tacks. Secure them into the box spring to hold the bedskirt in place. Then put the mattress back on top.”
Stretch the bedskirt evenly around, aligning the corners with the corners of the bed. Keep the plain, elastic side at the head of the bed. Check to see that the bedskirt hangs evenly all around.
Pro tip: When choosing a bedskirt, if you have trouble lifting your mattress, opt for an elasticized bedskirt that stretches around the box spring instead. It’s much easier to put on the bed.
Step 2: The topper
A mattress is a big investment, so it makes sense to have a mattress pad or a mattress topper to protect it from spills, stains, sweat and who knows what else. If you’re a hot sleeper, look for a cooling mattress topper or cooling mattress pad.
Donna Boue, owner and manager of upscale rentals on the Mississippi Gulf Coast, prefers toppers made with down alternative. “It’s easy to clean and hypoallergenic, unlike feather toppers that can irritate some people’s allergies,” says Boue.
Pro tip: When putting on a fitted pad or topper, start with the corner of the mattress that is the most difficult to reach. Next, slip it over the corner that is diagonal to it. It makes the job much easier. After all, you may still be recovering from lifting that heavy mattress.
Step 3: The fitted bottom sheet
Place the bottom sheet over the topper. As with the topper, start with the most difficult-to-reach corner of the mattress. Match the seams of the sheet with the seams of the topper and the mattress, making sure to pull the pocket all the way down until it slips under the mattress. (I always break a fingernail when I do this so be careful.) And if you’re in the market for a new mattress, here are our best mattress picks.
Move to the corner diagonally across and repeat. Match the seams of the sheet with the seams on the mattress and the topper. Stretch it and tuck it under the mattress. If your mattress is particularly deep, remember to buy fitted sheets with deep pockets, to ensure a good fit. If not, the fitted sheet will keep rolling off the corners and make your bed a complete mess every morning.
I love fitted sheets, but they do pose a problem when it’s time to put them on the bed. It’s hard to tell which is the shorter side because the elastic makes the sheet bunch up. I can’t count the times I’ve put on one corner only to find out it was the wrong way—either too long or too short to reach the other side. To solve that dilemma, I use a permanent marker to mark the inside seam of the one corner that I always start with. For me, it’s always the left side of the foot of the bed. That way, I never have to figure out which side goes where.
Step 4: The top sheet
There are a few things to remember about the top sheet. If it has a print, decide if you want the pretty side up or down. Some people put the printed side facing down so when they turn down the top sheet the pretty side shows. Others, like Boue, prefer the pretty side to be up. It’s your call.
Place the side of the sheet with the deepest hem at the head of the bed. Then position the sheet so it hangs evenly over both sides of the bed. Just eyeball it. No one’s going to bring a yardstick to your bedroom. Tuck in the sheets at the foot of the bed to your liking. If you like a nice, tightly made bed, tuck in the flat sheet using hospital corners.
To make hospital corners, after you’ve tucked in the sheet at the foot of the bed,
- Grab the edge of the sheet about 18″ in from the foot of the bed. Lift it to form a 45-degree angle with the mattress.
- Lay the angled part of the sheet on top of the mattress.
- Tuck in the part of the sheet that’s hanging down.
- Bring the sheet down from the top of the mattress.
- At this point, you can stop and you’ll have a sharp-looking corner. Some people tuck in the side of the sheet all the way to the head of the bed. Not me! It may look like a neatly wrapped bundle, but it’s a pain to get into. You have to untuck the sheets so you can get into bed, or else slide your body in and sleep like a human burrito.
- Repeat on the other side.
Step 5: The blanket
Blankets are optional, but Boue likes to add a woven cotton blanket between the top sheet and the duvet/comforter. “They have enough weight to make you feel cozy without being too warm,” she says. You can also try a specially designed cooling blanket.
For a finished look, Boue brings the top sheet about six inches beyond the head of the mattress, and the cotton blanket just to the top edge of the mattress. Then she folds that part of the top sheet over the blanket. I tried it and really enjoyed feeling the cool sheet, and not the blanket, against my face last night.
Step 6: The duvet, comforter or bedspread
There are several choices for the top covering for your bed: an all-in-one duvet, a duvet cover with a comforter insert, a comforter or a bedspread. All look great, but you want to ask yourself two questions before buying one: Will this be a hassle to handle, and how easy is it to keep clean? Read the care label, or do an internet search for some professional cleaning tips.
Making your bed with any of these bed coverings is easy.
Duvet or comforter

- Place the bed cover on the bed, making sure the sides are even.
- Then pull it up to the top edge of the mattress.
- Some people fold their duvet/comforter about a third of the way down when they make their bed. “I don’t fold the duvet,” says Reichert. “It makes it too bulky.” In my opinion, turning down the duvet makes no sense because bed covers are there to protect the sheets from dust, dog hair or whatever is floating in the air, right?
Bedspread
- Drape the spread on the bed.
- Make sure both sides of the spread are even (well, as even as you can eyeball it) and that the foot of the bedspread isn’t touching the floor.
- Bring the spread up to the top of the bed. Fold it back enough to cover the bed pillows. Place the pillows on the folded spread. Pull the spread over the pillows. Nice and neat—and your pillows stay covered.
Step 7: Sleeping pillows
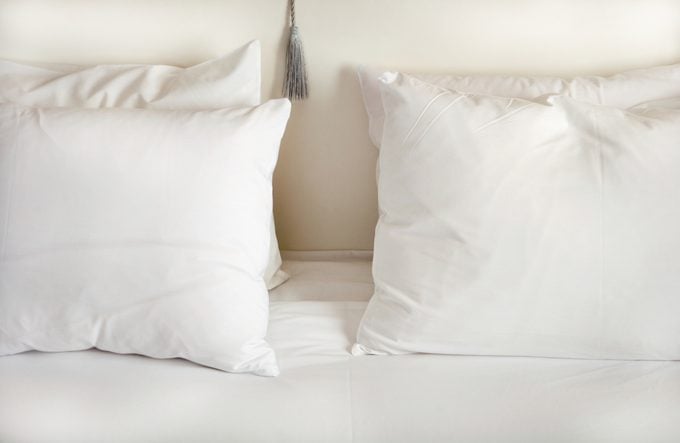
The next step in making your bed is to add the bed pillows. (And if you haven’t gotten new ones lately, they are definitely one of those bedroom items you should replace regularly.) First, cover the pillows with a protective pillow cover.
“Protective pillow covers are a must,” says Reichert. “Have you ever seen the stains on pillows that have not had a cover. It’s ugly.” If that comment hits home, no offense intended. But you may want to learn how to get yellow stains out of pillows before your mother-in-law spends the night.
There are a couple ways to put on pillow cases. For solid foam pillows, I like to fold the pillow in half lengthwise and slip it into the case. It unfolds nicely into place. This is particularly helpful when the pillow and the case are a snug fit. Another option is to grab the center end of the pillow, guide it into the pillow case, bringing each corner of the pillow into the corners of the case. Pull the case over the rest of the pillow.
Pro tip: If you want to add a touch of luxury to your bed, iron the pillow cases. “I do that when I have time or if we are expecting company and they are staying in the guest room,” says Reichert. Boue likes a smooth look to her pillow cases too. She irons her bamboo pillow cases because the corners wrinkle so badly. I used to starch and iron my own pillowcases, but I stopped after my tongue got stuck to the starchy surface.
Step 8: Decorative pillows
“Decorative pillows make a bed look beautiful, but they can be a lot of work,” says Reichert. There’s no limit to how many you can pile on—and zero is a perfectly acceptable number too.
“At our vacation rentals, we use Euro shams instead of multiple throw pillows,” says Boue. “They add a luxurious feel to a bedroom, and that’s what our clients like. At home, however, we don’t use the shams because, though they look nice, we have lots of pillows on our bed already—four king pillows and two standards.”
Step 9: Blanket throws
A blanket throw at the foot of your bed is the icing on the cake of bed-making. Not only are these throws perfect for taking a quick nap on top of the covers, they are great eye candy.
Choose where you place your blanket throw. Fold it lengthwise and lay it across the foot of the bed for a neat look or grab the center of the blanket and toss it diagonally across one corner of the bed for a more casual vibe.
How to keep your bed neat
After making your bed with such TLC, you’ll want to keep it looking lovely and neat. Here are a few suggestions for preserving that freshly laundered look.
- Make it a hard-and-fast rule that nothing goes on the bed during the day—no purses, no packages, no mail, no pets.
- If you have the space, put a chair in your bedroom so you’ll have a place to sit when getting dressed or changing shoes. That way, you don’t have to sit on your bed and muss the covers.
- Take a few seconds to smooth out the duvet/comforter/bedspread when you make your bed every morning. That wrinkle-free look makes such a difference. “When the duvet cover gets wrinkled, I pass the iron over the top of it to make it look nicer,” says Boue. “I do that in both our home and the rental homes.”
- If your bed pillows are washable, wash them at least twice a year, or more often, if needed. If you have pets that share your bed, or if you sweat profusely during the night (I didn’t want to bring that up, but facts are facts), you may want to wash your pillows four times a year. If you don’t know how to wash your pillow, now you will.
Source:
- National Sleep Association: “Bedroom Poll”


