

How to Organize Kitchen Cabinets for Faster, Easier Meal Prep

Updated: Apr. 08, 2024
Say "so long" to a cluttered kitchen. This simple guide will teach you how to organize kitchen cabinets in a way that makes meal prep a breeze.
If you consider kitchen organization your nemesis, you’re not alone. Admittedly, purging, editing and cleaning your kitchen can take a bit of time. But trust us: The benefits far outweigh the angst. Learning how to organize kitchen cabinets and incorporating kitchen-storage ideas can lead to faster and easier meal prep, as well as streamlined cleanup.
And you won’t just save time—you can also save money by using food and cleaning products before they expire. Plus, an organized kitchen is not only visually appealing but also beneficial for your mental health. In fact, a Journal of Environmental Psychology study found that clutter makes it harder for people to feel at home in a space, and a Personality and Social Psychology Bulletin study showed that an organized home can make you feel calmer.
Ready to learn how to organize kitchen cabinets? Set aside an afternoon, hit play on a podcast and grab some kitchen cabinet organizers. Then plan to reward yourself with your favorite beverage in a newly sparkling glass.
Get Reader’s Digest’s Read Up newsletter for more organizing, cleaning, humor, travel, tech and fun facts all week long.
1. Remove everything
The first step to organizing kitchen cabinets seems a bit counterintuitive—it involves making a mess of the kitchen. But we promise it comes with a big payoff. Once everything is removed, it will be easier to determine what to keep and what to reallocate.
Begin by emptying your cabinets and drawers completely. While that will create some visual distraction, it will also allow you to assess your items quickly. Smaller kitchens are somewhat easier to do all at once since they hold less stuff. For larger kitchens, you may want to conquer one or more zones at a time. These could be segmented into upper and lower cabinets, pantry or food storage areas, and overall cleaning.
2. Declutter
Consider every item to determine its worth in the kitchen and in your life. You don’t have to go full Marie Kondo and decide whether an object sparks joy, but you should be honest about what you’ll use in the future.
Segregate kitchen items into one of three piles—keep, donate or remove—and label boxes as you go. Be ruthless! Broken items that have sat behind doors for years should go. Ditto for any items that are simply unused. Let history guide your choices.
From there, you need to actually get rid of the items you’re not keeping; don’t let those piles hang around, causing even more clutter. Donate, sell or trash them as soon as possible. Some communities sponsor “curbside shopping,” where local pickers are encouraged to take unwanted items from the driveway. Online marketplaces connect buyers and sellers or those looking to rehome items for free or extra cash. Or find a local charity and make a donation.
3. Organize
Divide the “keep” pile by category. You’re not putting everything away just yet—you’re simply grouping like items, which will make it easier to figure out optimal storage solutions.
First, collect pantry and food items in one area. Then tackle everything else: Group dishes, glassware, pots and pans, bakeware, food storage containers, meal-prep tools, utensils, linens—you name it. When you’re done with step three, you should have categorized piles of kitchenware.
4. Create a plan
Most kitchens have space challenges of one kind or another. Thankfully, they’re usually not insurmountable. With some smart small-kitchen storage ideas, a few simple tools and the right shelving, you can enhance efficiency.
Knowing how to organize kitchen cabinets becomes a lot easier when you think about kitchen zones. Where do you cook? Dine? Store food? Tools, pots, pans and cutting boards should be in the work zone. A “pantry” or dedicated cabinets for food would ideally neighbor a food-prep area. If that space is too small to house everything, keep the regulars (i.e., pasta, oil and cereal) nearby and outfit another space for shelf-stable storage.
Weight and use make a difference as well. Avoid storing heavy, difficult-to-move pieces in upper cabinets. Large items that you use only occasionally (think: big appliances) don’t need to be in the kitchen at all. That said, if you’re really hurting for space, the countertop might be the best option for items that make daily living tolerable.
This is the chance to study what your kitchen is missing in terms of storage. That could be containers for leftovers, a place for place mats or a way to ease morning traffic. At this stage, devise a plan of attack. However tempting, don’t start stuffing items into your cabinets yet! Instead, take stock of your kitchen goods, including the items below.
Appliances

Scale-benders like food processors, blenders and stand mixers should always be stored at counter height or just below. That makes moving and using them easier. For peace of mind, keep all of the pieces together—when it’s time to whip up a cake, you want your beaters at the ready, not across the kitchen in a random drawer.
As for handheld appliances or those with smaller pieces, you can gather them in storage bins or baskets. If you have enough cabinets, go ahead and stash those bins inside. Short on space? You can store them in your pantry or a closet located near the kitchen. Or build an appliance garage, a kitchen space (of any size) that keeps appliances behind a closed door.
Consider leaving regularly used appliances, like toasters and coffee makers, on the counter. The same goes for the air fryer if it is making nightly appearances. With properly organized kitchen counters, the blender that makes your morning smoothie or the espresso machine that gives you an afternoon jolt can feel purposeful, not messy.
Pots and pans
There are many ways to store pots and pans, and it’ll all come down to the method that works best for your kitchen setup and cooking style. Check to see if you can alter your existing shelving to adjust for height. That will help determine which system to pick.
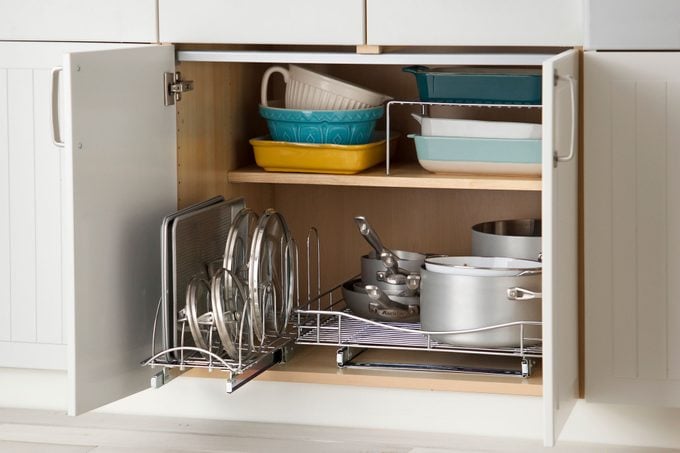
Keeping cookware close to the stove is ideal. You have a lot of options here: Deep drawers and cabinet shelves with a lot of height allow you to stack pots and pans on top of one another, with the lids nested to the side. Adding a tension rod to a pull-out drawer will help you keep lids in place. And a pots-and-pans organizer can be a simple solution for storing items on their side.
Feeling handy? Pull-out pot-and-pan shelves make accessing your cookware easy, though they need installation.
And remember, not everything needs to be put away. Understanding how to organize kitchen cabinets is as much about knowing what fits in your cabinets as it is about knowing what doesn’t fit. That gorgeous enamel pot can sit on the cooktop, and the rest of your pots and pans can hang from a rack above your kitchen island. Both tactics save valuable space in your cabinets, which you can now organize more effectively.
Utensils
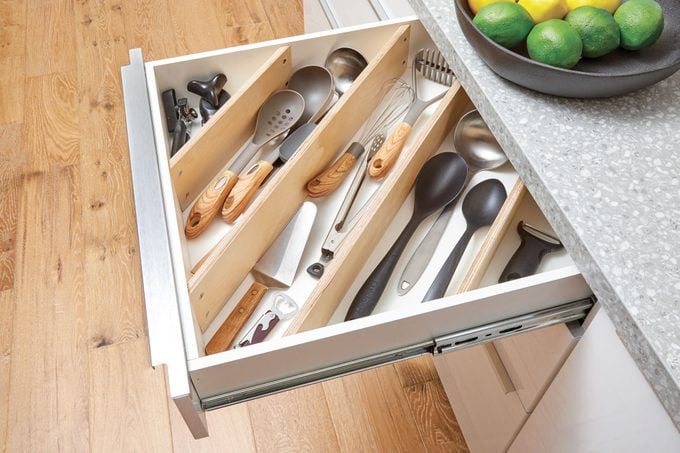
Utensils come in two categories: cooking and eating. Collect frequently used cooking utensils in a crock or container, which you’ll store in a convenient location. Heads up: It might take two containers to stash all of your spoons, spatulas, whisks and other most-used tools. Keep them close to food-prep areas. The same strategy works for knives—a special knife drawer organizer will keep them handy, but a magnetic knife-hanging strip will free up the drawer for another use.
For the less frequently used tools, storage space closer to prep areas is preferable but not essential. Sometimes, the drawers just aren’t available. Expandable kitchen drawer organizers can help contain the clutter and in some cases offer double layers of storage.
Draw organizers are equally useful for storing flatware; each slot can hold a different category of silverware: knives, spoons, forks and so on. Pro tip: Don’t forget to measure your drawers before ordering. Then pick a prime location. A drawer near both the dishwasher and dining area, if available, creates an efficient flow for setting the table and cleanup.
Food storage containers
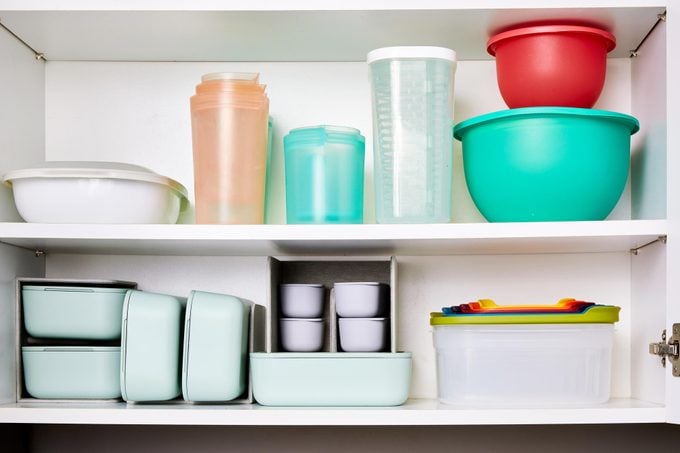
If you have a kitchen cabinet filled with a mess of food-storage containers and mismatched lids, you’re not alone. Whether glass or plastic, container storage remains a challenge. Make it easier on yourself by whittling down your collection and investing in items that make it easier to keep sets together and organized for efficiency and space.
First, recycle containers that you never use. And get rid of any that have seen better days—you don’t need that plastic bowl that partway melted in the microwave. If your collection still outweighs your storage needs, donate the excess.
Here’s a hard truth: You may need to rethink your collection of food-storage containers, especially if yours take up a ton of space. Stackable containers could be the solution. If your existing containers are “contained” but the lids are baffling, try a container lid organizer. In a perfect world, both lids and containers fit into a drawer or pullout cabinet shelf located near where you clean up. In reality, they might have to live in any space that’s available. At least keep them stored in lower areas, where they’ll be easier to manage.
Bakeware and beyond

So many items in the kitchen look as if they’ve been shaped to consume space, but bakeware takes the cake. Bread pans, baking dishes, pie pans—they’re all bulky. And let’s not forget about Bundt cake pans, which ask a lot of our meager cabinet space.
One smart organization strategy is to nest bowls and pans inside one another. Pull-out drawers work nicely for baking items. But if specialty baking is an occasional event and cabinet space is at a premium, take them out. Instead, relocate larger pans (like your turkey-roasting pan) to dead zones in the pantry or to a basement or alternative closet. They can even live stacked in plastic storage bins.
For everyday sheet pans and muffin tins, remember that the drawer beneath your oven can stash them without issue. Another option: Use a tray organizer to divide a shelf and organize large, flat items, including sheet pans, muffin tins and even cutting boards. Vertical storage creates room in the cabinet.
Food
Whether you have a pantry, butler’s pantry or a closet or cabinet masquerading as one, creating a dedicated food space will go a long way toward improved food prep. If you have the luxury of designing your kitchen, make sure the pantry is adjacent to your work zone. Even if a kitchen overhaul isn’t a reality right now, you can add an easy-to-assemble, freestanding pantry cabinet to your kitchen if you have an available wall.
Start your pantry-organization project by tossing any outdated food and impulse purchases that never saw the light of day. Then divide and conquer. Organize your food by category to assess your personal needs since food storage is highly individual.
Some things to consider:
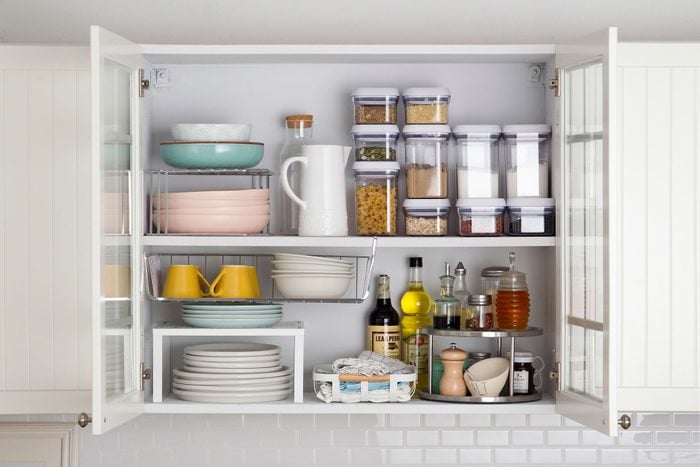
- Focus on top-to-bottom storage: Lighter and less frequently used items, including paper goods, can live up top. Mid-tier shelving should contain what you use every day. Lower shelves can handle heavier items and overflow.
- Keep the middle shelves accessible. Here’s where you’ll store cooking oils, spices (if not stored elsewhere), pasta and rice. Add a dedicated snacking station to keep rummaging to a minimum. Collect child-centric items in baskets or on a Lazy Susan. Make use of containers here too—nuts and dried fruit can go into airtight containers so they’re less likely to become a jumble.
- Don’t let cans get lost. Tiered shelving keeps them visible. Adding an extra rack can double the space.
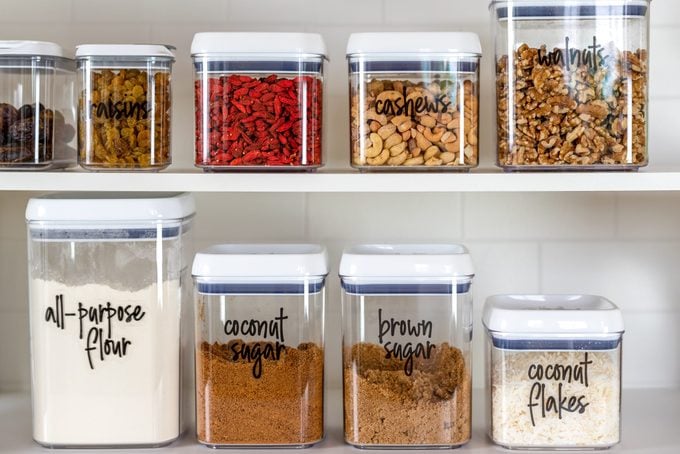
- Use clear, flat-topped storage containers for pantry staples like grains, flour and sugar. First, decanting keeps shelves cleaner (square bins stack more easily, increasing storage capacity). Second, putting beans, pasta and rice into airtight containers discourages unwanted critters from pillaging. And finally, clear containers make for easy viewing. Labeling with a paint pen or sticker helps too.
- Shallow containers are the perfect way to collect bottles of vinegar, oils and sauces to prevent sticky drips.
- Pay attention to your pantry doors, which are great for hanging storage.
Tableware
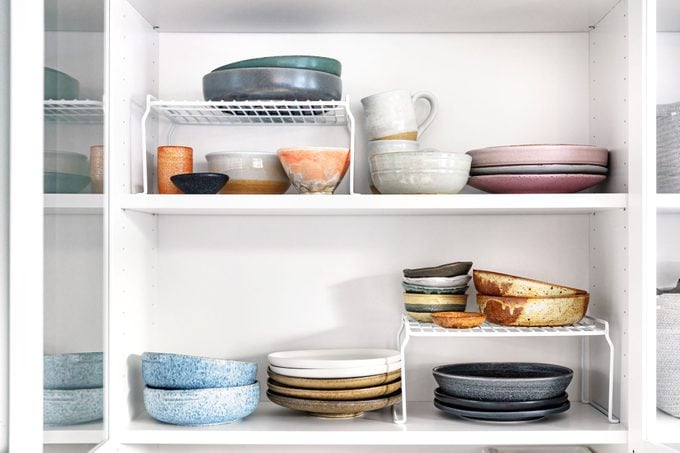
Locate dishes and glasses near the dishwasher. That way, unloading it is a breeze. Ideally, they’ll live in a cabinet that’s also adjacent to the dining area, saving you time when setting the table.
Beyond that, there are a few good rules of thumb to follow: Cabinets and deep drawers work equally well for dishes. Generally, daily glassware and ceramics make good neighbors. And when considering mug placement, target the coffee maker. You don’t want to hunt bleary-eyed for a mug while the machine brews your morning cup of Joe.
Specialty glasses don’t necessarily need upfront geography. If space is tight, for example, stack less-used martini glasses behind the wine glasses you might use more often.
Cleaning supplies
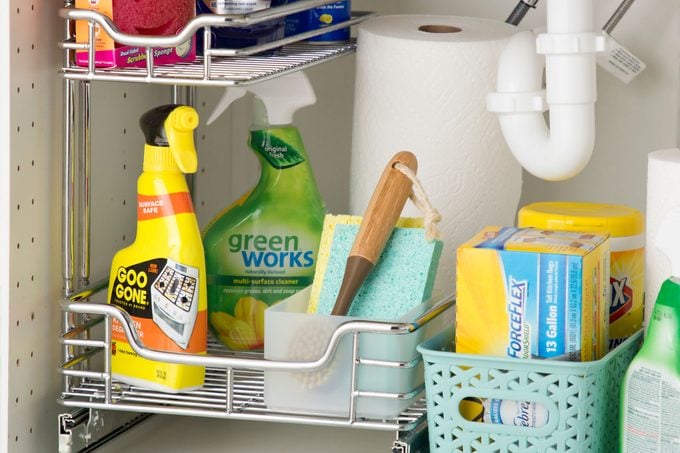
Don’t lose your cleaning supplies in the dark hole beneath the sink. Hang simple containers on the doors to hold tools and sponges. An extra wire rack is a great under-sink organizer that boosts storage space for your cleaning tools.
And don’t limit yourself in this spot. Yes, cleaning supplies are the natural inhabitants of these lower cabinets, but you can fit other items here as well. Despite the pipes, you can install a slim trash can and recycling bin. While you’re at it, learn some tips to ensure you always have an organized kitchen sink.
Linens
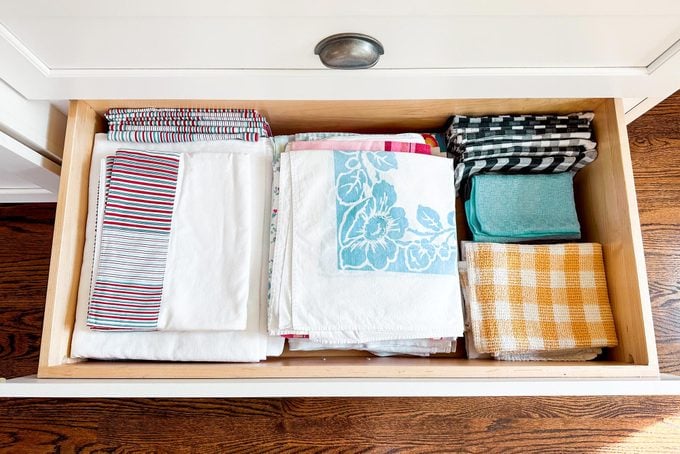
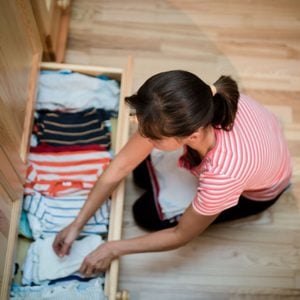
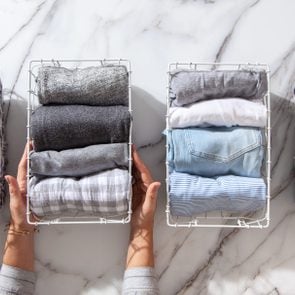
Storing table linens can sometimes feel like stuffing a suitcase for vacation. Edit your linen collection first to see if a lower drawer will work for place mats, napkins and dish towels. Deeper drawers are good for taller piles, but try rolling linens like dish towels in shallow drawers. Divide by category as well. Oven mitts and dish towels are better off near the work zone. Napkins and place mats should live closer to the dining areas.
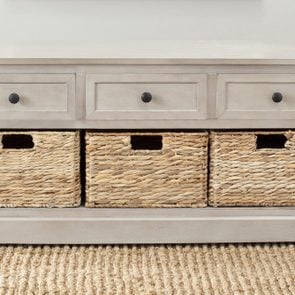
Dealing with a drawer-deprived kitchen? Place linens in low-profile baskets inside available cabinets. Or look for wall space to hang baskets of linens.
For all-out linen overflow (hey, it happens!), think beyond your kitchen cabinets and drawers. A bureau in the dining area might be the solution. Also look for unused spaces where cabinets or an island end. There might be room to tuck a woven trunk, taller basket or tiered rolling cart. Remember, you can always roll that rolling cart away before company arrives.
5. Assess your space
By now, you’ve removed everything from your cabinets, sorted it into categories and strategized storage solutions. Before you jump right in to putting things away, take a look at your empty cabinets and drawers with fresh eyes. You may discover previously unused (or underused) space.
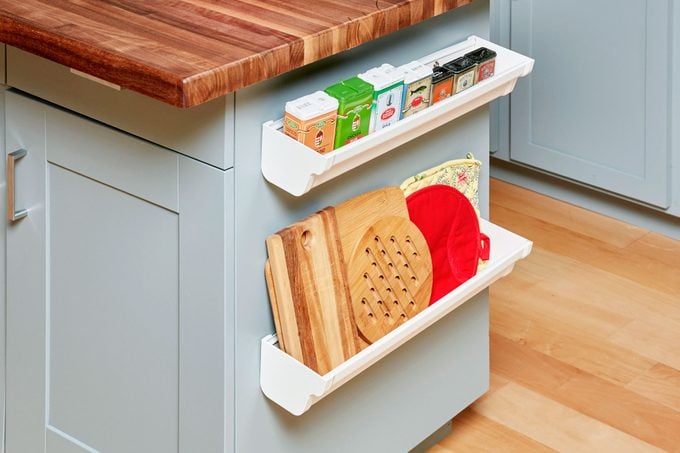
Look for available space on the inside of cabinet doors and along walls. Hang baskets on the inside of the door to create a charming repository for linens, for example. Or try this spice storage idea: Mount a spice rack on the interior of a door or on the wall to free up shelf space while keeping frequently used items within arm’s reach.
And of course, think beyond your cabinets when considering free space. Wood shelves on an unused wall can host mugs and glasses. If space allows, a small rolling island helps with overflow.
6. Diagram the space
It’s time to label the various spaces in your kitchen. This can be temporary, but it helps to make an index card for every cabinet and drawer. Ensure there is a spot for everything before placing the items inside.
Believe it or not, this will save time—it’s not the doing but the redoing that is time-consuming and frustrating.
7. Clean
Before putting anything back, take the extra time to clean the items in your kitchen. (Or go above and beyond and clean your entire kitchen.) The items you’re keeping may need a good wash if they’ve been stored for a while. And don’t overlook the shelves, drawers and cabinets themselves. Open shelving attracts a surprising amount of grime, and even interiors protected by doors accumulate dirt.
How to clean cabinets and shelves
To clean your kitchen cabinets, you will need a clean cellulose sponge, mild dish soap and paper towels or soft, absorbent towels.
- Working from top to bottom with a cloth towel or duster, wipe all shelves and cabinet interiors to remove dust. Change cloths frequently, and be sure to wipe the door interiors and exteriors.
- Add a few drops of dish soap to a small bucket of warm water. Wipe the shelves with a damp sponge or towel, dipping and rinsing often. With a clean, damp towel, wipe any residue off the shelves if necessary. Let them air-dry briefly, then dry them completely with an absorbent towel.
- For super-grimy shelves, consider a degreaser. Always test a small area first and remove any remaining degreaser with a damp towel before drying.
8. Fill your cabinets
It’s finally time to reload your cabinets and drawers with all of the kitchen items you’ll be keeping. Follow the categories on your index card to place every dish, glass, pot, pan, food and other tool in its new home.
9. Maintain the organization
If disorder tends to percolate weekly, set aside half an hour each week to restore the kitchen. And mind your daily-cleaning tasks too: Every night, clean the dishes and clear the counters to maintain your spotless workspace. Once or twice a year, repeat the kitchen cabinet organization process.
Once you’re done and on a maintenance schedule, meal prep and cleanup will be faster, giving you more time to do the things you love.
Sources:
- Journal of Environmental Psychology: “The dark side of home: Assessing possession ‘clutter’ on subjective well-being”
- Personality and Social Psychology Bulletin: “No Place Like Home: Home Tours Correlate With Daily Patterns of Mood and Cortisol”
Originally Published: March 11, 2024