How to Take a Screenshot on Your iPhone
Updated: Jan. 29, 2024
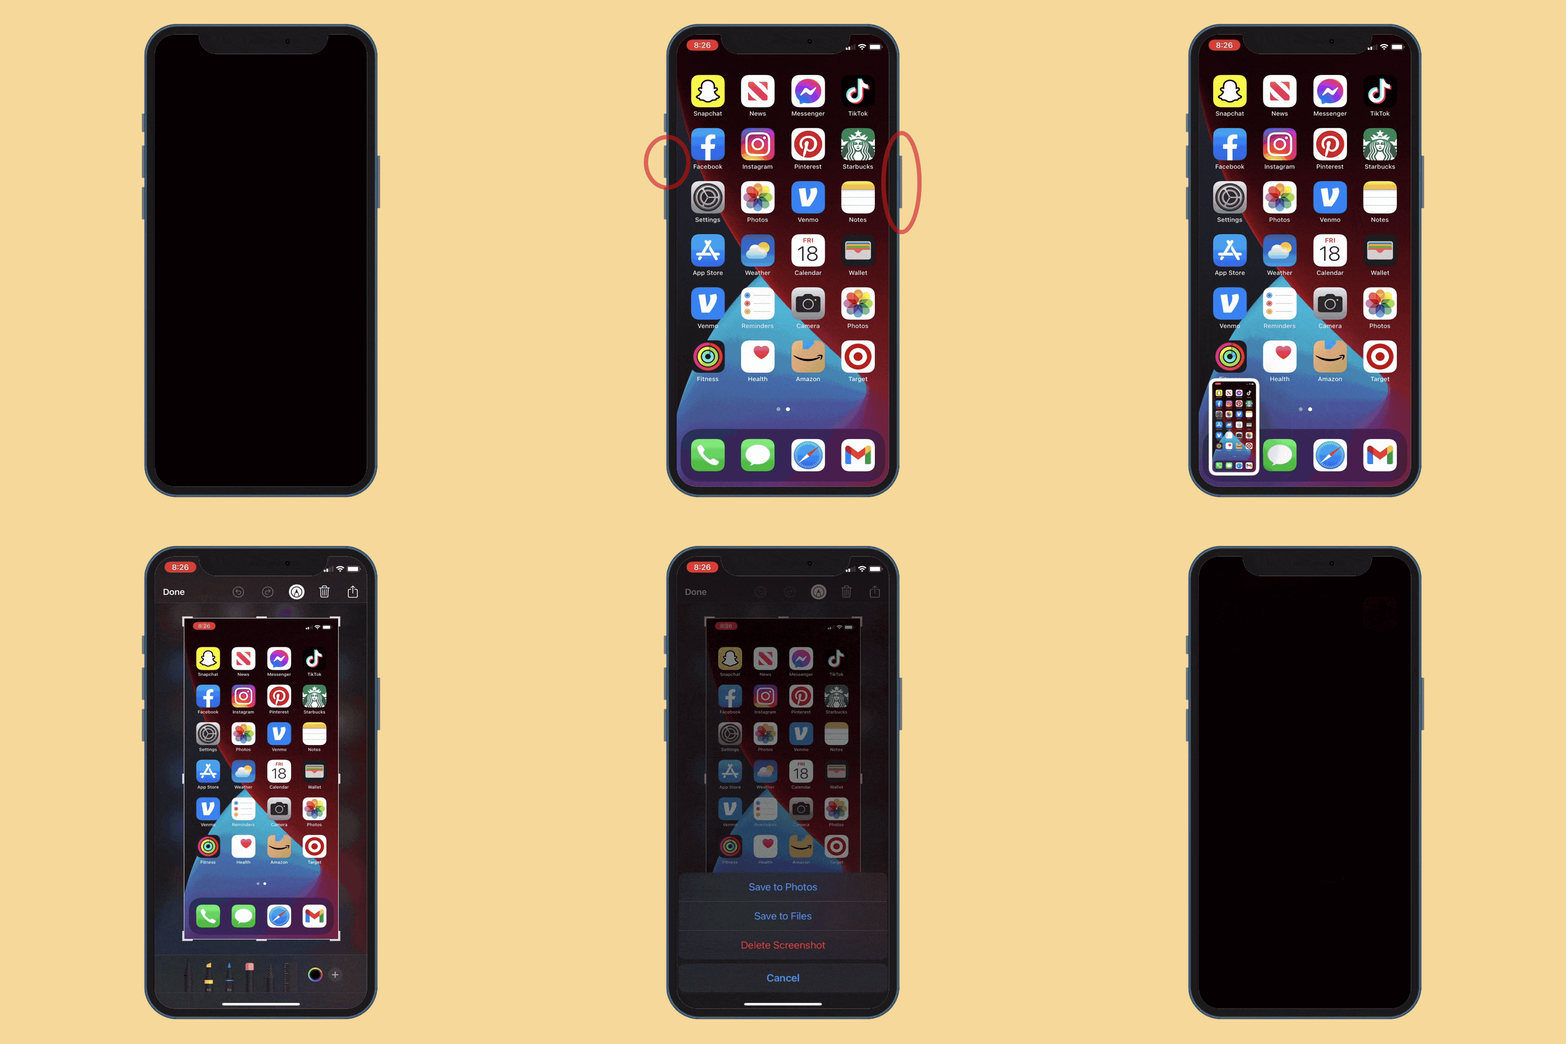
Whether you have a new phone or an older model, taking an iPhone screenshot is a snap.
Screenshots are a handy visual record, and an easy way to keep track of things you’ll need close by. See a hilarious meme you want to share? Screenshot it. Need a copy of your vaccine card? Screenshot it. Want to remember your app organization before you get a new phone? You guessed it: Screenshot. Not only can you screenshot on an iPhone, but you can also pick up the skill in no time flat. Screenshots can also help you image search on an iPhone and it’s arguably one of the easiest iPhone Hacks out there.
And even not all iPhone models function the same way, we’ve got you covered. With our easy step-by-step guide, you’ll be taking screenshots in a snap. So let’s get started—it’s a good idea to test your screenshooting skills before you’ll need to use them. When you’re done, learn how to hide photos on your iPhone, how to edit photos on your iPhone like a pro, recover deleted photos from your iPhone, and screen record on your iPhone.
If you don’t have a home button on your iPhone
Newer-model iPhones (from the X to the 13) rely on Face ID instead of Touch ID, so they don’t have a home button. If that sounds like your device, follow the steps below to take a screenshot.
Step 1
Make sure the image you want to capture is displayed on your screen.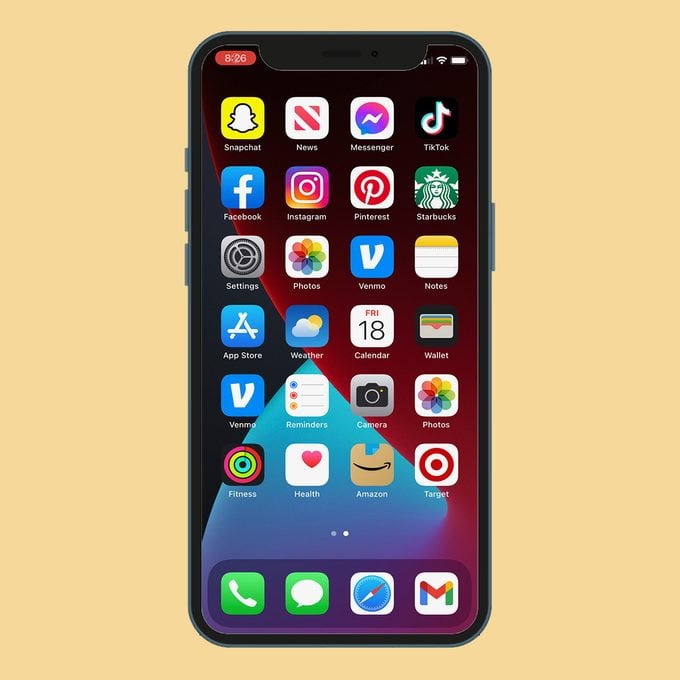
Step 2
Simultaneously press the sleep/wake button (on the right side of your screen) and the volume up button (on the left side of your screen).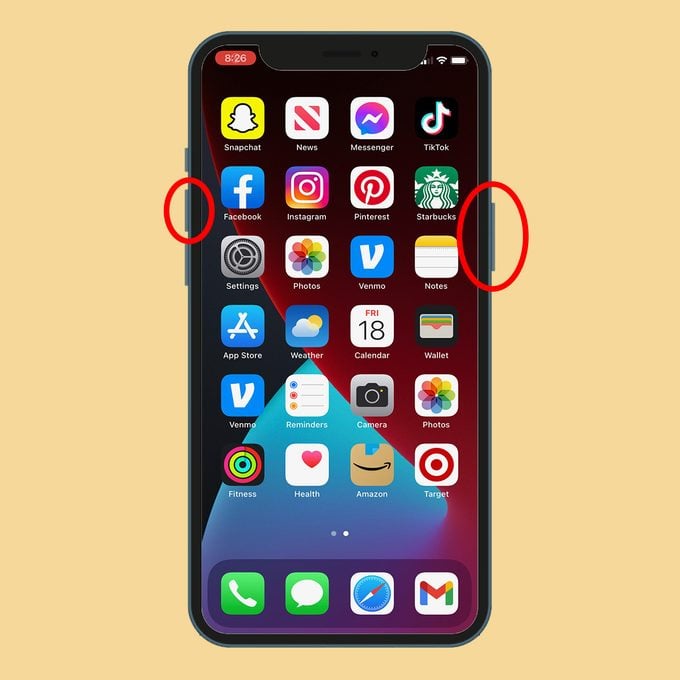
Step 3
Quickly release the buttons. If you press down for too long, your phone might offer you the option of shutting down instead of taking a screenshot.
Step 4
The screen will briefly flash, and if your volume is up, you’ll hear the sound of a photo being taken.
Step 5
A preview image will appear in your screen’s lower-left corner. Swipe left on the image to dismiss it, or tap it to open. Once it’s open, you’ll have the ability to edit, highlight, delete, upload, share, or save your image.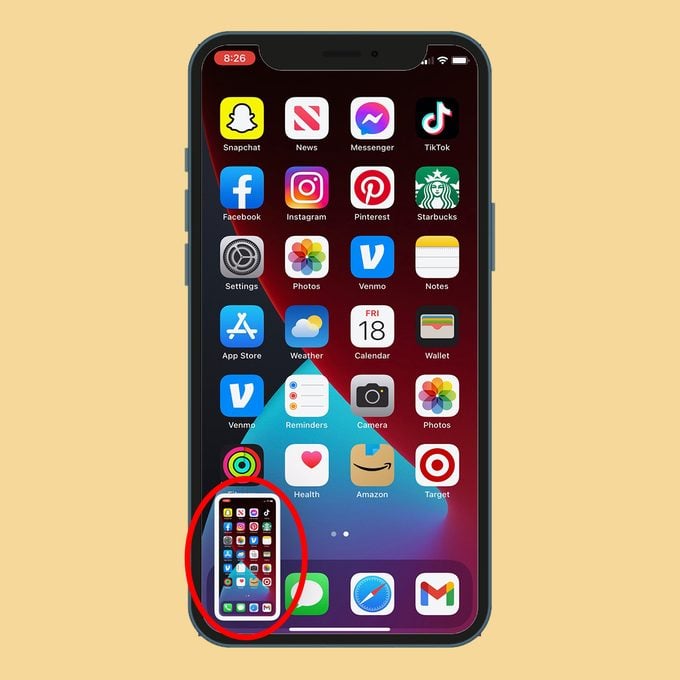
If you don’t want to modify or move your screenshot right away, you can keep taking screenshots—even while the preview image is still visible on your screen. Don’t worry, it won’t show up on the screenshots you take.
If you have a home button on your iPhone
Earlier iPhone models (from the 6 through the 8 Plus) and the iPhone SE have a physical home button at the base of the phone. You’ll be using that to take a screenshot on your iPhone.
- Make sure the image you want to capture is displayed on your screen.
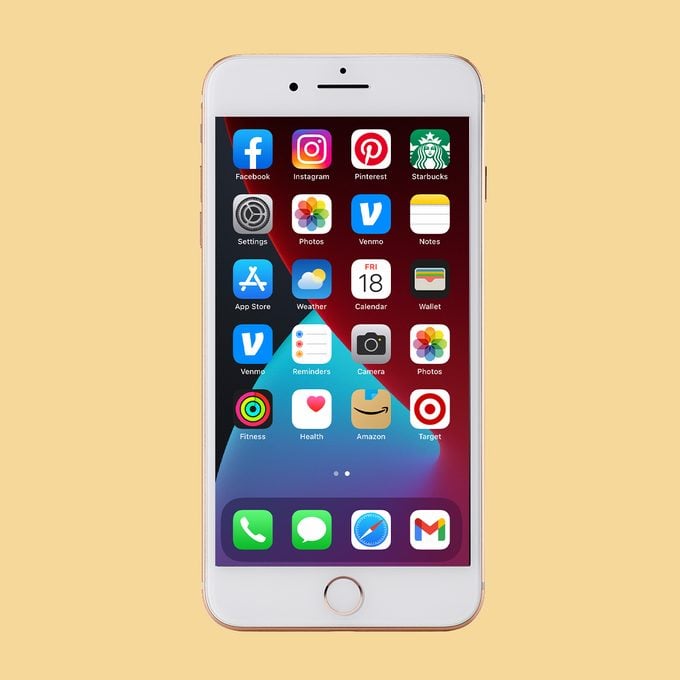
- Simultaneously press the power button (either on the top or the right side of your phone, depending on your model) and the home button.
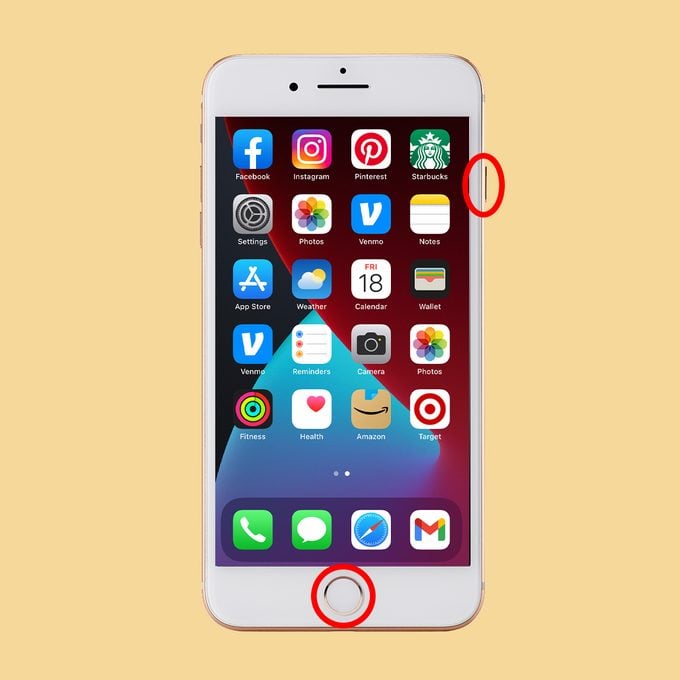
- Quickly release the buttons. Press for too long, and your phone may think you want to shut down.
- The screen will briefly flash, and if your volume is up, you’ll hear the sound of a photo being taken.
- A preview image will appear in the screen’s lower-left corner. Swipe left on the image to dismiss it, or tap it to open and edit, highlight, delete, upload, share, or save your image.

As with later-model iPhones, you can keep taking screenshots while the preview image remains in the lower-left corner—it won’t appear on your screenshots.
If you want to avoid buttons entirely
Some people find it difficult to hold an iPhone while pressing two buttons at once. For times when you’d rather tap than press, Apple iOS has a hidden feature called AssistiveTouch. It’s an added accessibility feature available on iPhone, iPad, or iPod touch.
With AssistiveTouch, you can avoid pressing buttons or swiping, and instead create your own alternative ways to screenshot or complete other basic tasks.
Step 1: Turn on AssistiveTouch
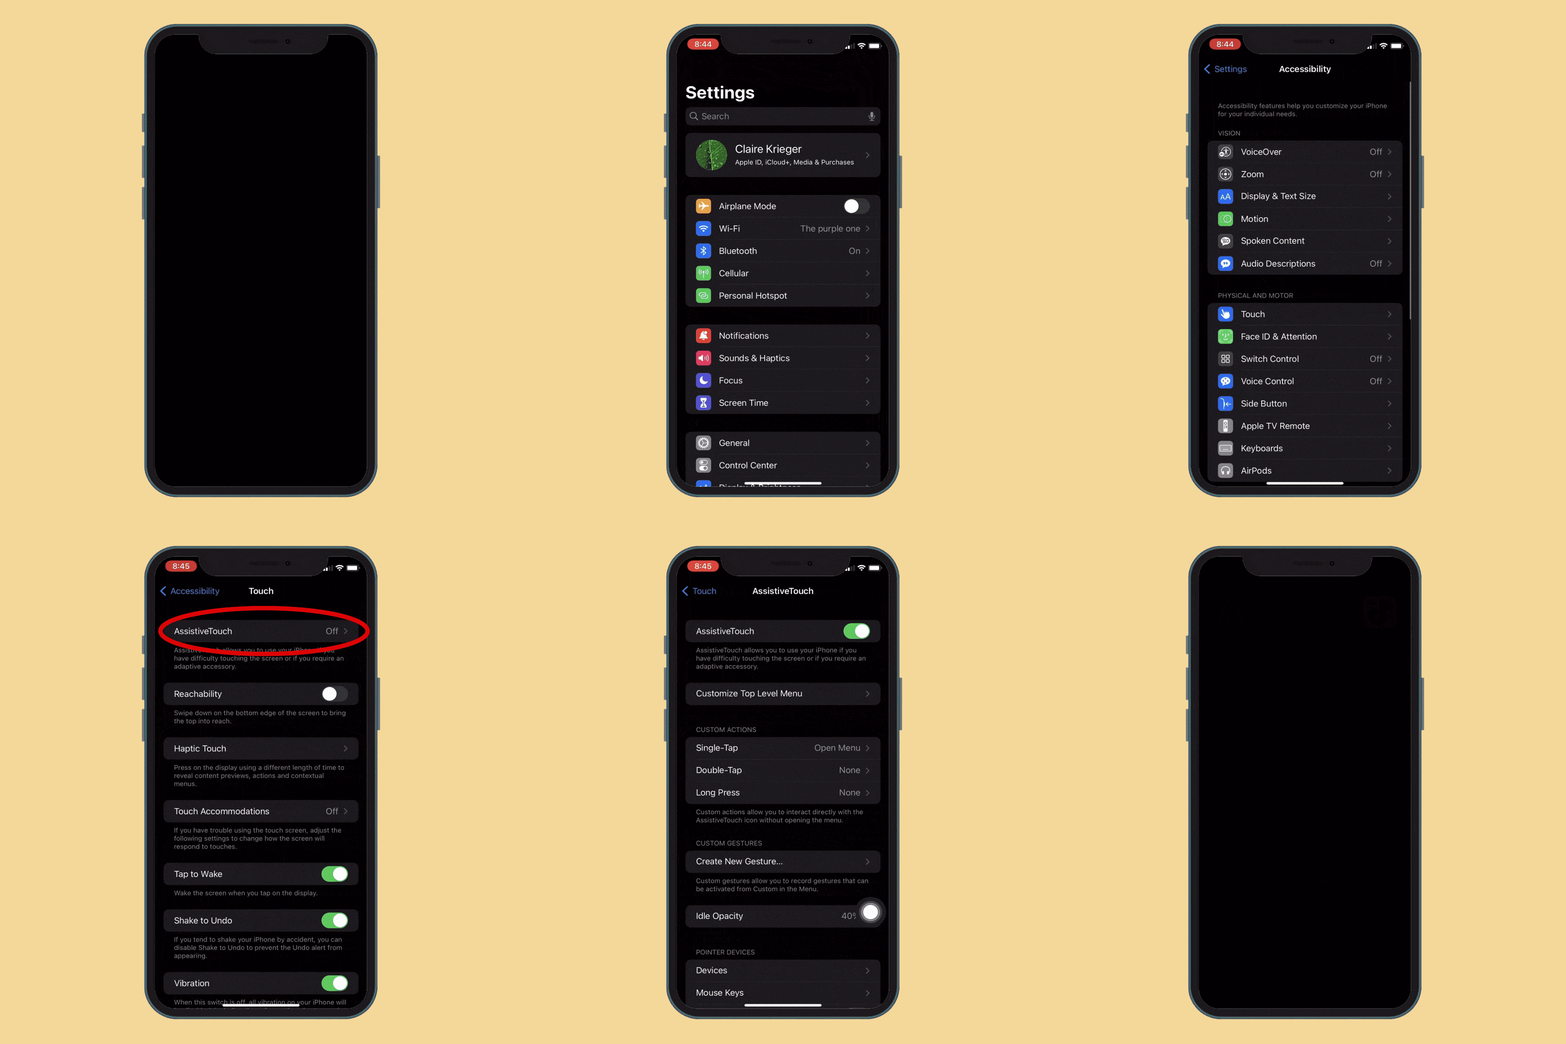
Before using AssistiveTouch to screenshot iPhone images or texts, you’ll have to set it up. There are a couple of different ways to turn on this accessibility feature.
Turn on AssistiveTouch through Touch settings:
- Go to Settings.
- Click on Accessibility.
- Click Touch.
- Select AssistiveTouch.
- Toggle the Assistive Touch field to on.
Turn on AssistiveTouch through Accessibility Shortcuts:
- Go to Settings.
- Click on Accessibility.
- Click Accessibility Shortcut at the bottom.
- Select AssistiveTouch.
The easiest way to turn on AssistiveTouch:
- Simply say “Hey, Siri. Turn on AssistiveTouch.”
You’ll know AssistiveTouch is turned on when you notice a black, gray, and white circle on your screen.
Step 2: Use AssistiveTouch to take a screenshot on your iPhone
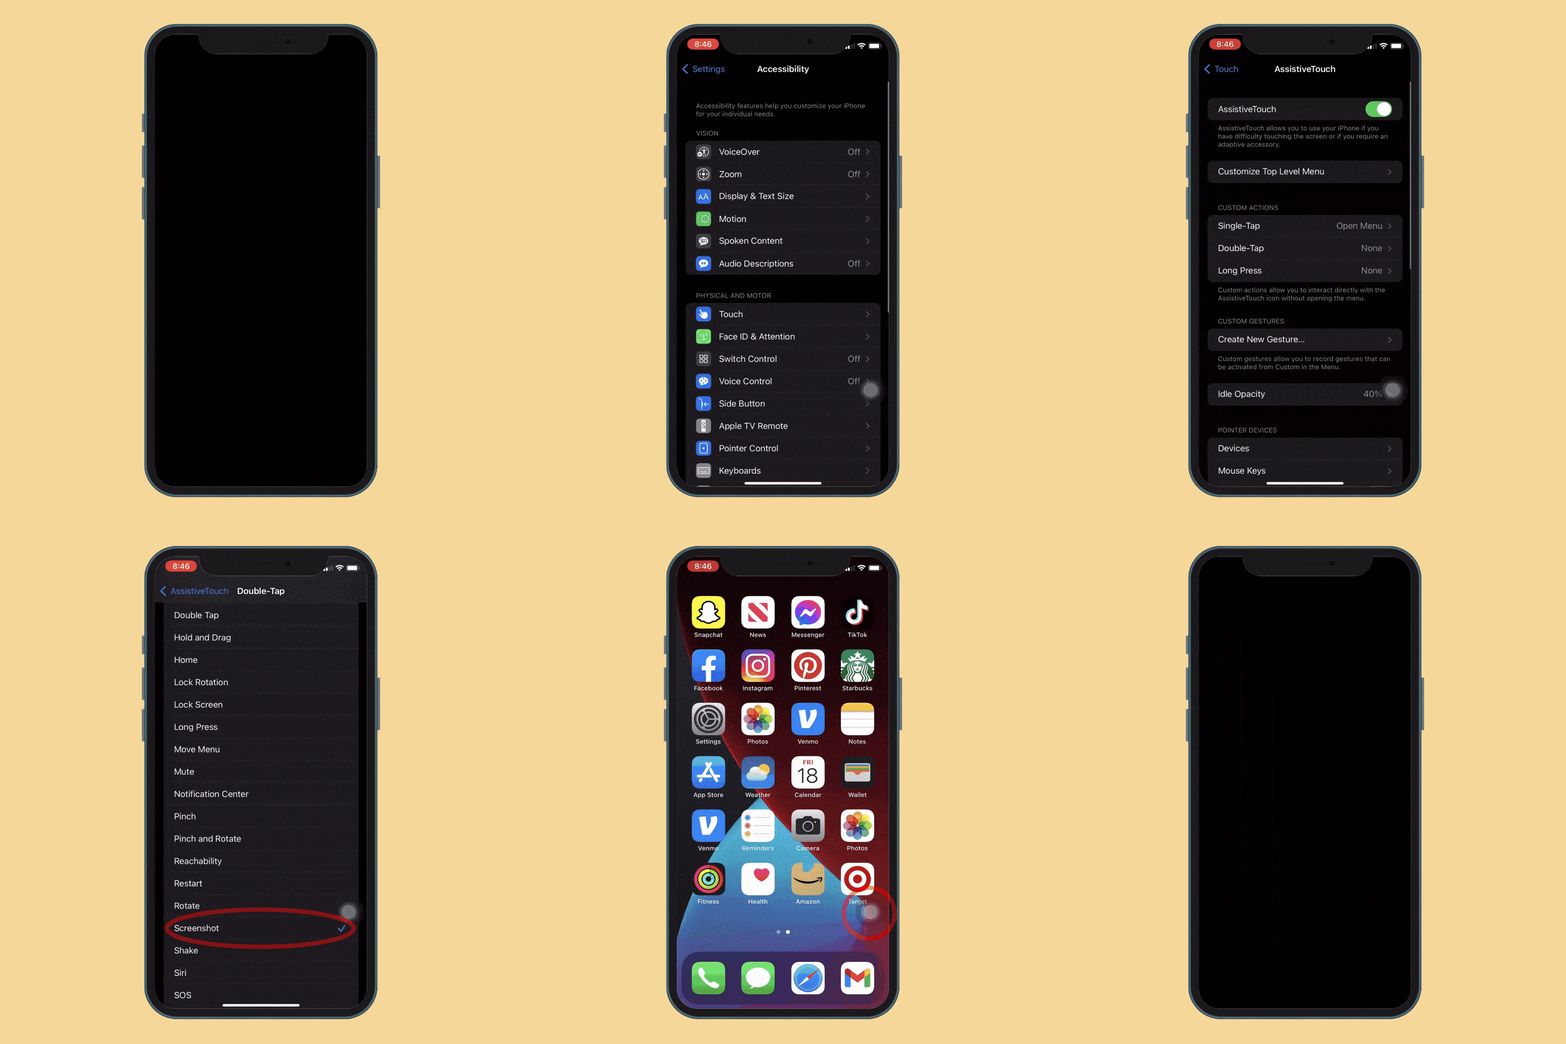
Now comes the fun part. With AssistiveTouch turned on, you get to choose how to take a screenshot on your iPhone. From the AssistiveTouch menu, you have a few options, including performing taps to complete actions.
Take a screenshot by double-tapping the screen:
- Go to Settings.
- Click on Accessibility.
- Click Touch.
- Click AssistiveTouch.
- Click Double-Tap.
- Select Screenshot.
- Double tap the AssistiveTouch circle on your screen to take a screenshot.
Take a screenshot by double-tapping the back of your phone:
- Go to Settings.
- Click on Accessibility.
- Click Touch.
- Click Back Tap.
- Click Double Tap.
- Select Screenshot.
- Double tap the back of your phone to take a screenshot. Don’t worry if you don’t get it right the first time; it can take a few tries.
A couple of things to consider before using the back-of-phone tapping method: If you have a thick phone case, you might have to tap a bit harder. And if you tap your fingers when nervous, you might end up with loads of unexpected iPhone screenshots. If that’s the case, it will be really helpful to know iPhone tricks like how to delete your photos.
How to view your iPhone screenshots
Viewing your screenshots is super easy. If you have iCloud Photos turned on (find out by going to Settings, then Photos), your image will pop up in the Recents album. That’s not the only place you’ll find your screenshots, though. You’ll find a Screenshots album in the Photos app, and it’ll hold all of your screenshots.
Now that you’re a pro at taking screenshots with your iPhone, find out how to hide apps on your phone.
Sources:


