

How to Make Your Facebook Private to Protect Your Personal Info

Updated: Jan. 23, 2024
With a few tweaks to make Facebook private, you can control who can see your posts, your friends list and more
Facebook is the most popular social media platform in the world, and for good reason. It helps many of us stay in touch with friends, family and neighbors, and it makes doing so easier than communicating with each of them individually. But its massive popularity might also be a good reason to learn how to make Facebook private.
After all, many people include personal data, like their hometown, birth date, marital status, friends list and more, in their profile. And you don’t want all of Facebook’s 2.9 million active users to have access to that. It can open you up to data theft, Facebook scams and possibly even spam texts.
What’s more, many people like to use the platform to “check in” at restaurants, live performances and more, or to post their vacation photos in real time for their friends to see. But either of these habits could tip off burglars that you’re not home—or tip off potential employers about some personal behaviors that you might not want them to know about. Fortunately, Facebook provides several tools that allow you to restrict who can see the information you post. Keep reading for some clever tech tips that’ll teach you how to make Facebook private.
Get Reader’s Digest’s Read Up newsletter for more tech tips, humor, cleaning, travel and fun facts all week long.
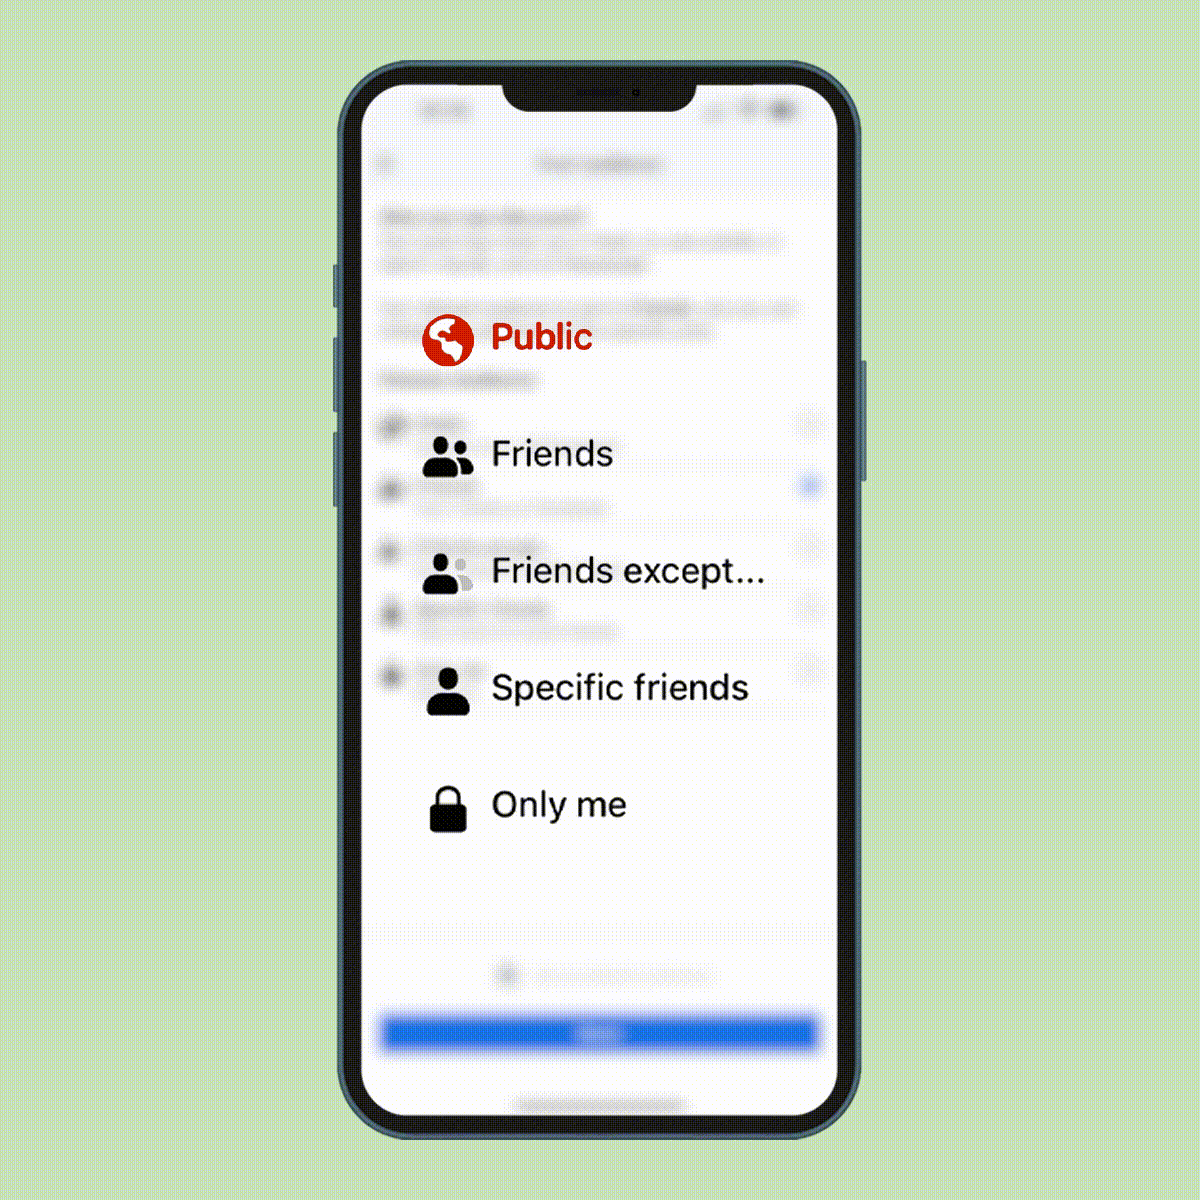
Facebook’s privacy levels and what they mean
Facebook allows you to specify who can see various aspects of your profile. You can set your privacy for any of the following audiences:
- Public. If you want to make a Facebook post shareable to a wide audience, this is your best bet. Anyone on or off Facebook can see posts set to “public.”
- Friends. Anyone on your Friends list can see posts with this setting.
- Friends except. You can specify the people on your Friends list who should not see a given post. This is handy if you’re trying to plan a surprise for someone or if you’re Facebook friends with colleagues who you don’t want to see what you do outside of office hours.
- Specific friends. Think about this as the opposite of the “friends except” option. Most people use this to indicate a small set of individuals who have access to a given post—maybe you’re posting about an inside joke or providing details about an event that only a handful of people should know about.
- Only me. Some people like to post things on their own timeline but don’t want anyone else to know about it. Maybe you saw a recipe you don’t want to forget about but don’t necessarily want to share, or perhaps you have a photo you want to save but don’t want others to see—”only me” is perfect for this.
Looking for tips on how to make Facebook private in the strictest sense of the word? While your account won’t be 100% confidential, you’ll get the most private Facebook account possible by selecting “Only me” whenever it’s an option.
How to make your Facebook private
You can make several aspects of your Facebook account private, either from a web browser or the smartphone app, and that all starts in “Settings & privacy.” (It’s also where you’d go to change your name on Facebook.)
On a web browser
If you’re using a browser to adjust your privacy settings, the first step—no matter your end goal—is to navigate to Facebook’s privacy center, which you can do by following the steps below.
- Click on your profile photo in the upper-right corner of the page.
- Click on “Settings & privacy.”
- Select “Settings.”
- In the sidebar on the left side of the page, select “Privacy.”
From there, you can adjust your online privacy, limiting who sees your posts and profile, blocking people and adjusting who can message you, tag you, post on your page, follow you or comment on your posts.
To make your posts private
- Go to the “Your Activity” section.
- Click “Edit” next to “Who can see your future posts?”
- Select who you want to see your posts. If you want a post to be completely private, click “Only me.”
Within this section, you can also adjust who can see posts you’ve shared in the past and who can see the people, pages and lists you follow. (By the way, you can also use Facebook’s snooze button to hide posts from a pal for 30 days.)
To make your Facebook account less visible to others
Within this section, you can modify who can send you friend requests, see your Friends list, look you up using your email address or phone number, or find you on a search engine.
- Go to the “How people find and contact you” section.
- For each option (such as “Who can send you friend requests?” and “Who can look you up using the email address you provided?”), click “Edit” to adjust privacy settings.
- Select the appropriate setting from the drop-down menu. For the most privacy, select “Only me” when possible.
To prevent random people from sending you private messages
In this section, you can choose where message requests end up: your Chats list or the “Message requests” folder. You can also decide not to receive message requests at all. (If you do accept and create discussions, learn all the fun ways you can name a group chat.)
- Go to “How you get message requests.”
- For each option (such as “People with your phone number” and “Friends of friends on Facebook”), click “Edit” to adjust settings.
- Select where you’d like to receive message requests from the drop-down menu. To avoid messages from certain people, select “Don’t receive requests.”
To limit who can post on your page, see what others post or tag you in posts
- In the left-hand sidebar, click “Profile and tagging.”
- Adjust each item to your desired level of privacy. For the greatest privacy, select “Only me.”
To modify who can “follow” you or comment on your public posts or profile info
- In the left-hand sidebar, click “Public posts.”
- Edit each item accordingly.
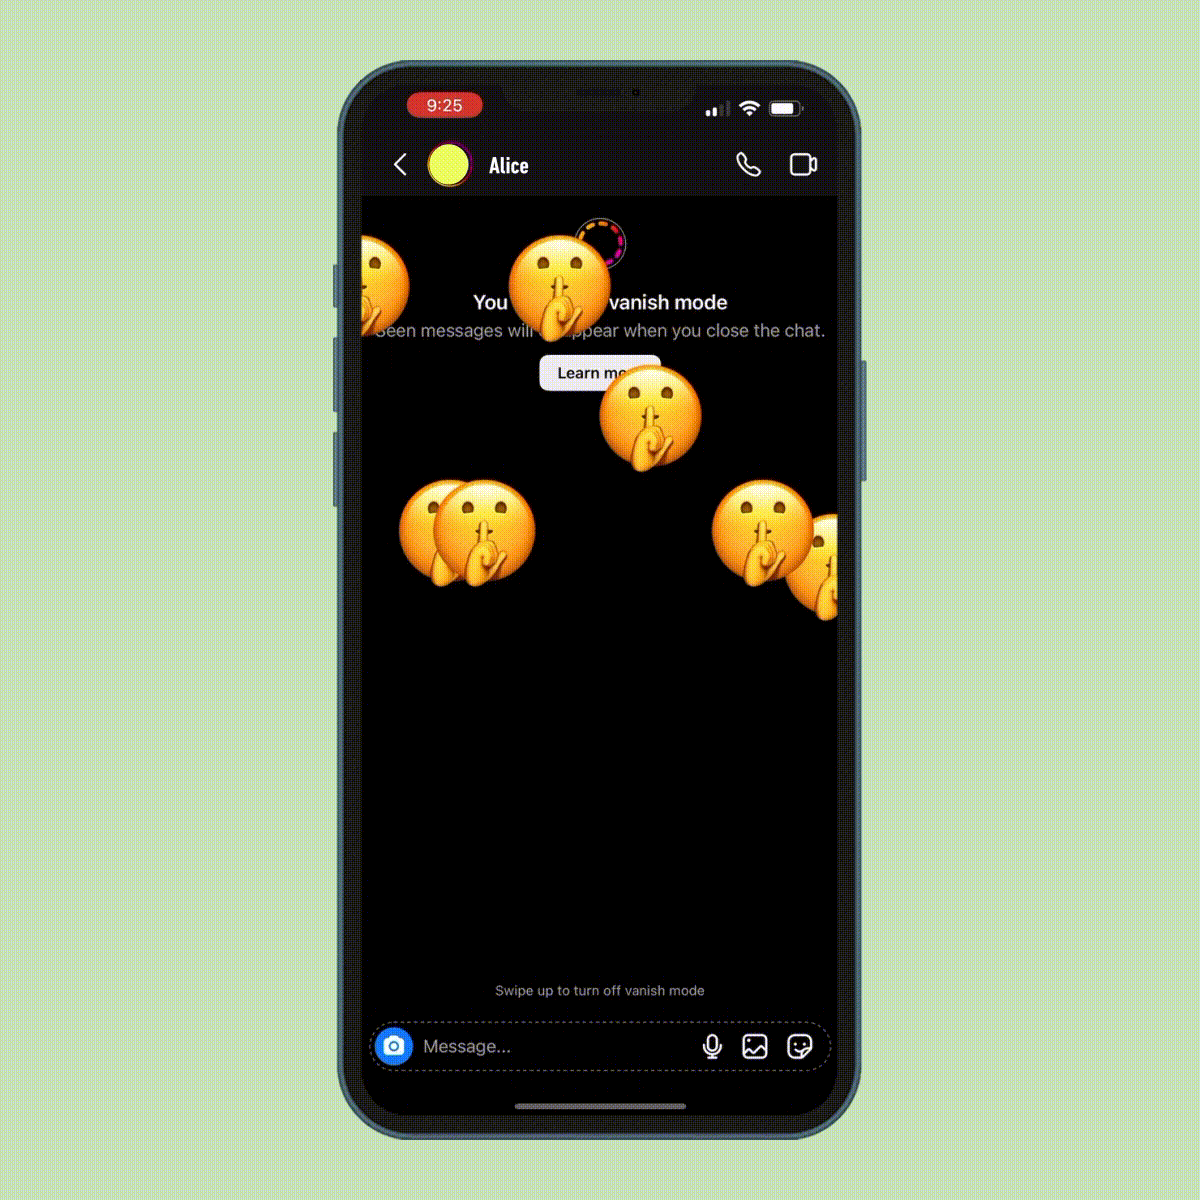
Want to keep things even more private? Use Facebook’s Secret Conversations feature for covert chats with friends.
To block certain people from seeing or commenting on your posts
In this section, you can block users; block messages, app invites and event invites from a user; block apps and pages; and create a restricted list.
- In the left-hand sidebar, click “Blocking.”
- Click “Edit” next to the category (such as “Block users” and “Block messages”) you’d like to change.
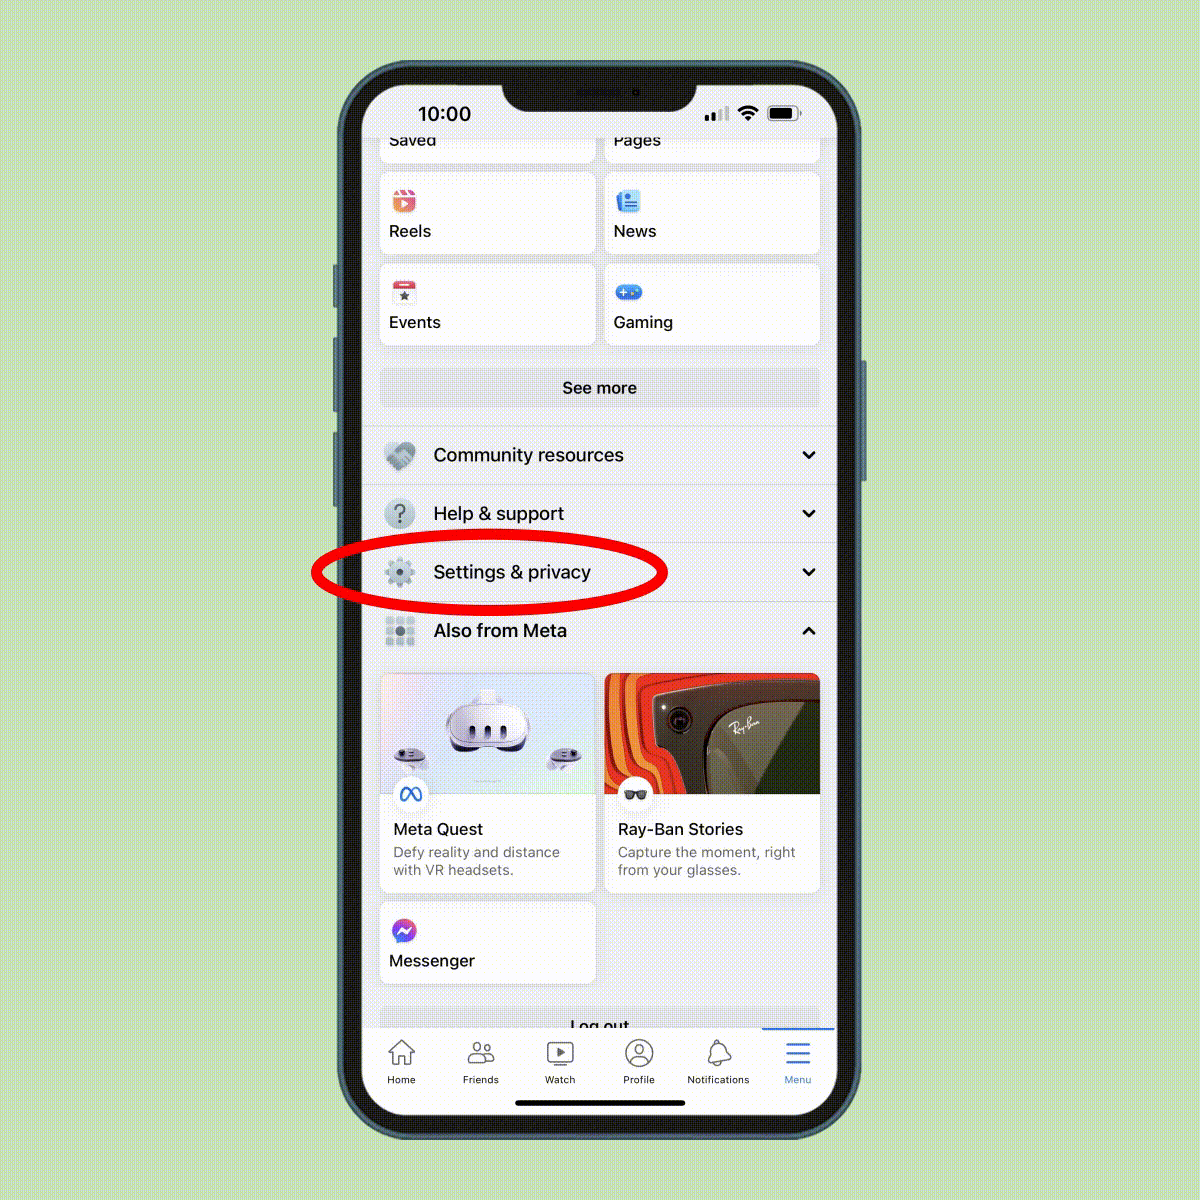
On the Facebook mobile app
- Click “Menu” in the bottom-right corner of the home screen.
- Scroll down to “Settings & privacy.”
- Tap “Settings.”
- Scroll to the “Audience and visibility” section.
From there, go one by one through each of the following categories, and edit them according to your desired level of privacy:
- “How people find and contact you”
- “Posts”
- “Stories“
- “Reels”
- “Followers and public content”
- “Profile and tagging”
- “Blocking”
- “Active status”
Hungry for more tips? You’re going to want to learn how to save videos on Facebook so you can watch them later.
Using Facebook Privacy Checkup
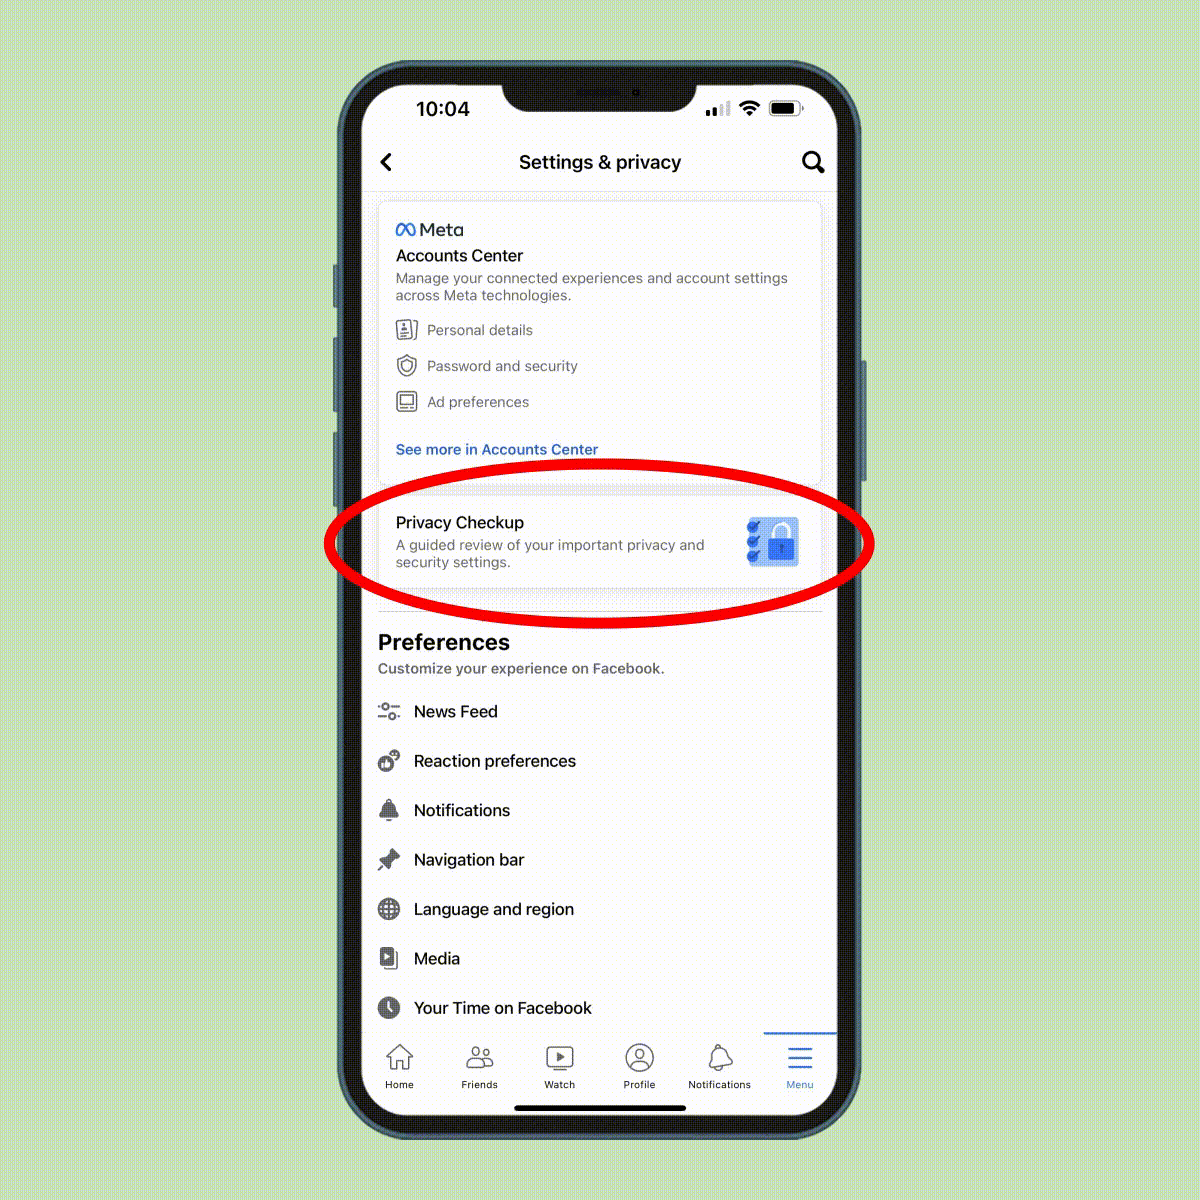
If you want to be sure you haven’t overlooked anything when it comes to online security, Facebook can walk you through a series of privacy settings to ensure that all aspects of your profile are as secure as you’d like them to be. These include:
- Who can see your posts. This lets you tweak the audience settings for both past and future posts and stories, and it allows you to determine who can see the information in your “About Me” section, like your occupation, birth date, where you live and work, contact information and Friends list. You can also use this to block specific people.
- Who can find you on Facebook and how. This determines whether people can find you on Facebook via a search engine like Google, who can send you friend requests and which of your friends (if any) you permit to see your email address and phone number.
- How to keep your account secure from hackers. This section will evaluate the security of your password and enable you to turn on two-factor authentication and notifications any time someone logs into your account from an unrecognized device.
- Your data settings. This allows you to control the websites and apps that allow you to log in using your Facebook credentials.
- Your advertising preferences. Here, you can determine whether you want Facebook to show you targeted ads based on your browsing history and the demographic information you provide in your profile. You can also specify whether friends can see which advertisers you interact with on Facebook.
The way you find the privacy checkup tool varies slightly, depending on whether you’re using a web browser or the app on a mobile device.
On a web browser
- Click on your profile photo in the upper-right corner of the page.
- Click on “Settings & privacy.”
- Select “Privacy Checkup.”
- Choose the privacy topic you’d like to start with and follow the series of prompts.
- Continue for each of the remaining four topics.
Here’s a helpful Facebook secret: You can enter “privacy” in the search bar at the top, and your first result should be “privacy checkup.” Click on “Privacy Checkup” at the top of the page and follow the steps above.
On the mobile app
- Click “Menu” in the bottom-right corner of the home screen.
- Scroll down to “Settings & privacy” and tap it.
- Tap “Settings.”
- Tap “Privacy Checkup.”
- Choose the privacy topic you’d like to start with and follow the series of prompts.
- Continue for each of the remaining four topics.
You can also enter “privacy” into the search bar at the top, and “privacy checkup” should be your first result. Tap that, and you should see “Privacy Checkup” at the top of the next page. Tap it, then select a topic and follow the prompts.
FAQs
If you’re still curious about how to make Facebook private, read on for answers to some commonly asked questions.
Can I see who has viewed my Facebook profile?
No, you can’t see who viewed your Facebook profile. The social media platform doesn’t have this functionality, and neither do third-party apps, even if they make claims to the contrary. There’s also no easy way to see who’s blocked you.
How do I adjust the privacy settings for my Facebook photo albums?
You’ll find this setting in a separate area from those above.
- Click your profile photo (or tap “Menu” and then your name on the app).
- Click or tap on “Photos” (you’ll need to scroll down on the app).
- Click on “Albums.”
- Select a photo album.
- On the page that opens, click on the three dots to the right of the album title (at the top of the page in the app).
- Click “Edit album.”
- In the panel on the left side of the page, click on the current privacy setting (for example, “Friends”). This will appear after the description on the app.
- Select the new privacy level.
- Click “Done” (or “Save” on the app).
If you want to adjust the privacy setting for an individual Facebook photo, follow the first two steps above, then click “Your photos.” Click on the photo you want to change your settings on, click the three dots on the right, select “Edit post audience” (it’ll say “Edit post privacy” on the app) and modify your audience as you wish. If a photo is part of an album, you may not be able to do this.
Can I adjust the privacy settings for the things I post in Facebook groups?
No. Only group administrators can change the privacy settings for a group. In addition, groups have only two levels of privacy: public (anyone on or off Facebook can see who’s in the group and what they post) and private (only group members can see who’s in the group and what they post). So if you’re in a public group, be conscious of what you share on Facebook.
Can I see what my Facebook page looks like to other users?
Yes. Click on your profile photo. Click on the three dots at the top of the page, then select “View As.” That will show you what the public sees. To return to normal, click “Exit View As.”
And that’s it! You’ve now learned how to make Facebook private so you can enjoy the social media platform without worrying that important details are falling into the wrong hands. Next, find out how to save a video from Facebook Messenger.
Sources:
- Forbes: “Top Social Media Statistics and Trends of 2023”
Originally Published: June 26, 2023